Saturday, March 30, 2013

Vegan tahini-filled chocolate eggs, and carob-raisin-crisp bites

40 comments
I have definitely moved into long weekend mode. We spent much of yesterday in a national park east of Perth. Today I have baked muffins, baked cupcakes, and made the things in this post. I am feeling very content.


I was initially concerned about posting the chocolate creations I made today. There are lots of chocolate-themed recipes around at the moment, not to mention an excess of Easter products if you venture near any shops. However, I'm not sure you can have too many chocolate recipes, and I am so enamored with these ones that I don't have the patience to save them for another time. If you are looking for any last minute Easter ideas, these also have the advantage of being quick and easy to create.

The tahini-filled chocolate eggs are adapted from Chocolate Covered Katie's vegan peanut butter eggs. They aren't quite as impressive as Gabby's peanut butter caramel filled eggs, posted on The Veggie Nook last week, but I like them a whole lot nonetheless.


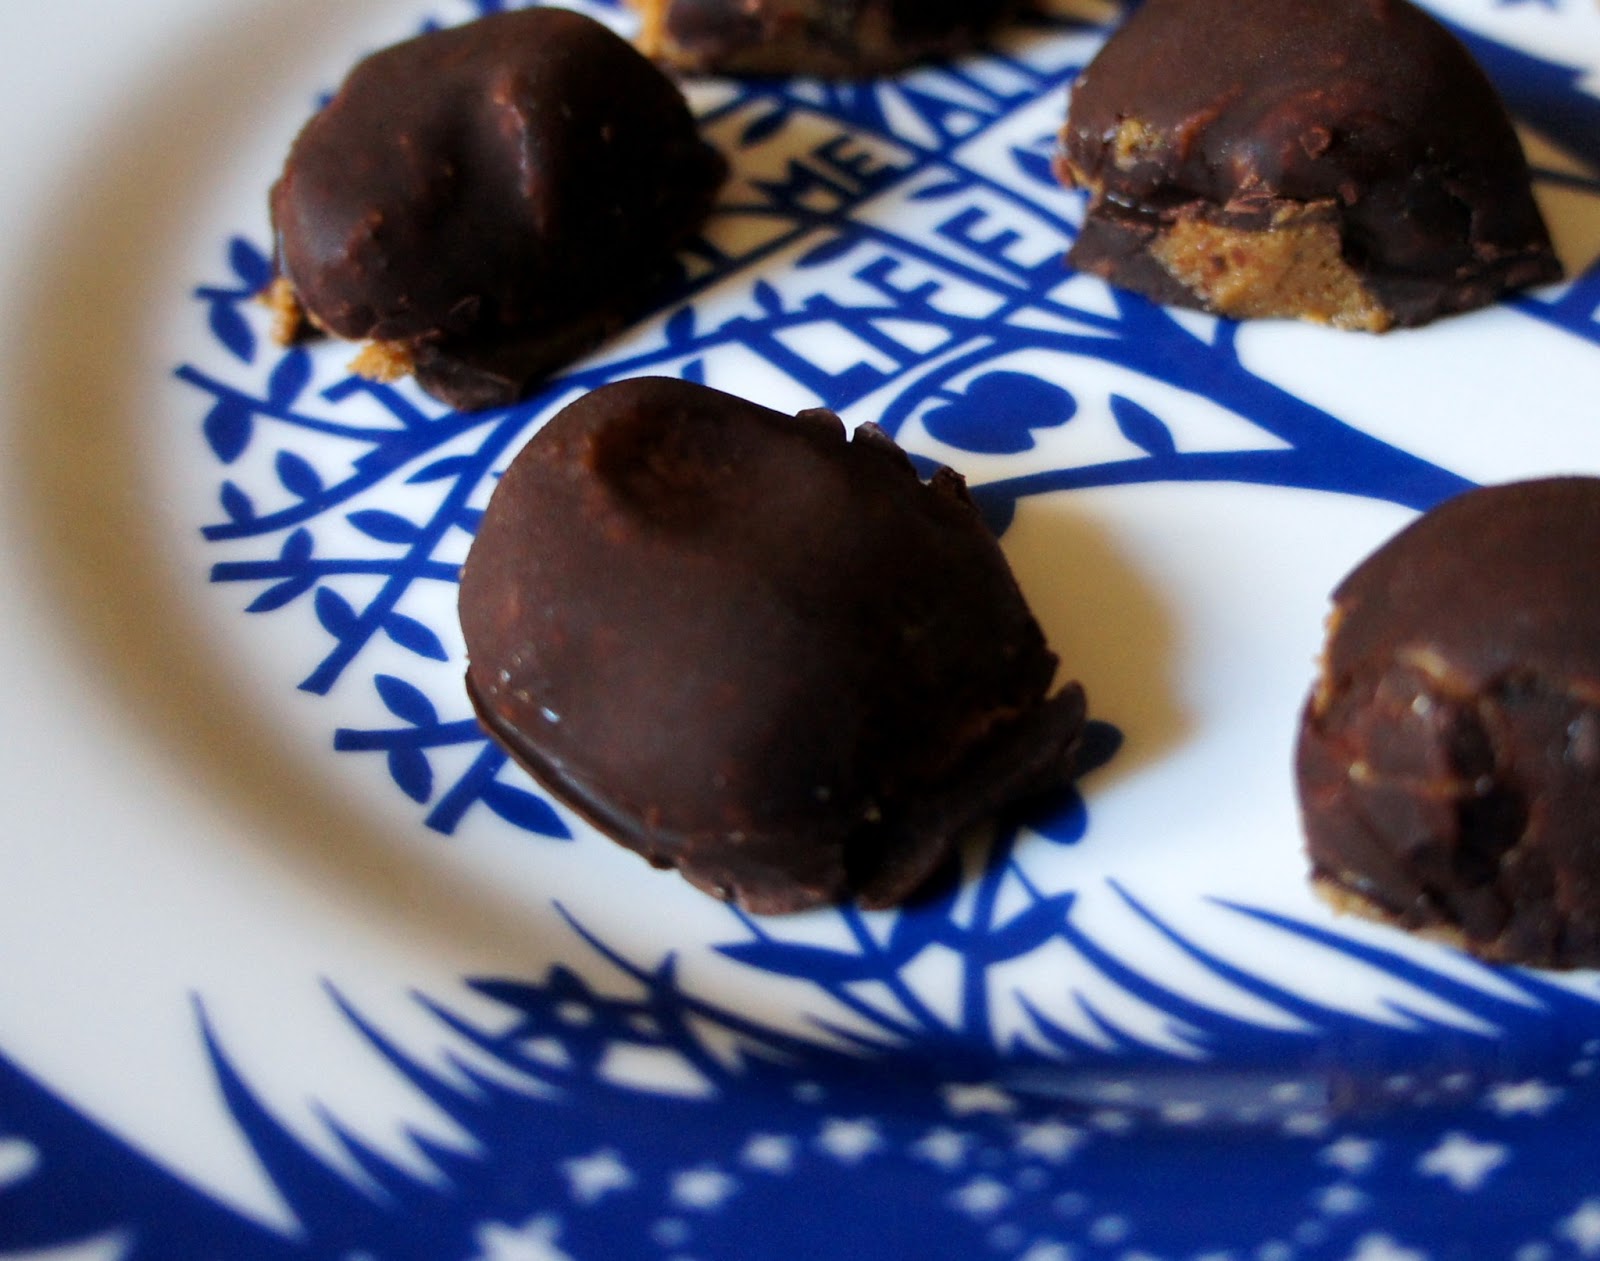
With a short ingredient list and a creamy filling, these eggs are less sweet than Reese's peanut butter cups and  they have a darker chocolate shell. Both features are advantages to my taste buds, and it turns out that tahini contrasts extraordinarily well with chocolate. Extraordinarily.

Tahini-filled chocolate eggs
Vegan and no bake
Makes 10 eggs


Ingredients
Filling -
1/4 cup unhulled tahini (sunflower seed butter)
Generous pinch salt
1 - 2 tbsp brown sugar (to taste)
1 tbsp custard powder

Chocolate coating -
2 tbsp coconut oil
3 tbsp good-quality cocoa
2 drops liquid stevia

Method
Combine the filling ingredients in a small bowl, mix to combine, and chill in the freezer for at least 30 minutes.

Line a plate or baking tray with baking paper. 

Place the coconut oil in a small to medium bowl and warm to liquid state if necessary. Add the cocoa and stevia and stir well to combine.

Remove the tahini filling from the freezer and scoop out small balls using a teaspoon. Roll between your hands, then dip into the chocolate mixture using a spoon. Roll to coat. Remove and place on the prepared baking paper. 

Repeat for the remainder of the filling mixture, then place the chocolate eggs in the freezer for at least 2 hours, until set. When set, remove from the baking paper and trim any excess chocolate from around the eggs using a sharp knife. Serve immediately, or store in the freezer until serving.


Where these tahini eggs are creamy and decadent, the following carob-raisin-crisp bites are crispy and decadent. A variation on my carob crunch bites with goji berries, they can also be made with cocoa if carob isn't your thing. Similarly, other sorts of dried fruit can be substituted for the raisins and/or you could add chopped nuts to taste.


However you make them, they are likely to be enjoyable alone, with tea, or even on top of some vanilla soy ice cream...

Carob-raisin-crisp bites

Vegan and no bake
Makes about 10 medium-sized pieces


Ingredients
2 tbsp coconut oil
3 tbsp carob
1 drop liquid stevia
Pinch salt
1/4 cup raisins
1/4 cup puffed rice, puffed millet or other puffed cereal
Few tablespoons granola (optional)

Method
Line a small square or rectangular dish with baking paper.

Place the coconut oil in a medium bowl and warm to liquid state if necessary. Add the carob and stevia and stir well to combine. Add the remaining ingredients and mix well to coat the raisins and cereal thoroughly.

Transfer mixture to the prepared dish and press down. Chill in the freezer until set, at least 2 hours, and then cut into squares.


I wouldn't call these Easter chocolates (I'd hate to limit them to just one time in the year), but I think I'd rate them above most commercial Easter option.

On the topic of Easter - I hope you have a very happy day tomorrow if you celebrate it, and an equally happy day if you do not!


I am sending the tahini-filled chocolate eggs to Healthy Vegan Friday #36 and Catherine's 'anyone can cook vegetarian' Easter egg theme on Cate's Cates.

Thursday, March 28, 2013

More out and about in Perth

21 comments
I don't know about you, but I am seriously ready for this long weekend. It is definitely one of the highlights of the fast half of the year. Four. days. off. work.

(Incidentally, does everyone get a four day weekend for Easter? Americans seem to have a completely different holiday system, so it has just dawned on me that the four day thing may not apply to those of you over there. If not, I am very, very sorry.)

Before launching into the weekend, I thought I should bring us up to speed on some recent outings we have had around Perth. The work side of things has been busy lately, but we have still managed to fit quite a lot in outside of work hours.

All photos are from my phone, so I apologise for the dubious quality...

Rooftop Movies in the city centre.


For Christmas, my brother gave us passes to a rooftop movie set up that happens in the city over summer. On top of what roof, you might ask? A car park roof is what. It is quite a novel experience to head to the top of a multistory car park with the view to watching a film on the roof! 

Waiting to enter

The movies shown are mostly classics and 'retro' films, although some new releases are scattered through the program too. We saw Samsara, a 2011 release that was filmed over five years in five continents, covering religious rituals, natural beauty, natural disaster zones, and human industry. It is entirely in pictures, no words, and was quite suited to a Friday night on top of a car park roof!

The roof top set up (the vans were selling food)

Riverside walking.

This is the time of year to be outside in Perth. Those grey skies I mentioned aren't there all the time, and when they're not - there is dazzling sunshine coupled with moderate temperatures. It would be foolish not to go outside and enjoy it.

Resting'on a bench, looking over the Swan River.

This is the same area we visited this time last year, on Mr Bite's birthday. It's a beautiful spot.


Indoor rock climbing.


This activity stemmed from another present voucher, this time from Mr Bite for my birthday last December. I've been talking about going indoor climbing for quite some time, and he thought the voucher might allow us to actually get to doing it.

It did, albeit four months later, and it was a very fun afternoon. It was also a very exhausting afternoon. Rock climbing is hard!


We managed to reach the top of some of the easier climbing sections, but I was definitely confronted (yet again...) by my lack of arm strength. It was a fun sort of confrontation though, and I would definitely take sore arm muscles from rock climbing than sore muscles from, say, basketball.

What have you been up to lately?
And - what are you planning for the weekend?!

Tuesday, March 26, 2013

Strawberry coconut almond spread, for autumn

39 comments
I know that for many of you, grey skies and rain are not that exciting. If I was at the end of winter, they probably wouldn't be that exciting to me either. If Perth was the sort of city to turn off sunshine for the next 6 months and give me only grey skies and rain, I might also be a little apprehensive.

However, for me, in this part of the world, at this time of year - grey skies and rain are delightful. Exhilarating, wonderful, and delightful.

Yesterday I had soup. Last night I slept under a quilt. This morning I ran in long sleeves in the rain. Today I wore a scarf and took an umbrella to work. I wrapped my hands around my cups of tea and soaked up their warmth. I am thinking about porridge.

Hello, autumn.

I am very happy.

If I'm honest, our grey skies and rain have still been accompanied by temperatures around 20'C (68'F), and at least some sunshine each day. Autumn in Perth is pretty mild. If we had weather like this all year round, I might want to live here forever instead of moving to a country that has more grey skies and rain than sun.

Today's post isn't only about weather. I know not all of you share my (extreme) interest in that topic, and those of you at the end of Northern Hemisphere winter might deservedly be annoyed with me for rejoicing in weather that, to you, probably sounds like summer.


No, today's post is also about food. It is about all the things I am suddenly wanting to make now that cooler weather is upon us. I am dreaming of plum muffins. I am thinking about oats. I want to bake with spices. This upcoming Easter weekend should be a lot of fun.

I don't have baking for us today - time is still a teeny bit lacking - but I do have something that you could spread on baking, or hot cross buns, or just plain toast. It is an easy twist on Hannah's chocolate coconut hazelnut butter of 2011, which has the magical quality of also turning into fudge, and which I have made many a time.


This strawberry coconut almond spread is not much like the chocolate hazelnut version, but it has an ingredient list that was inspired by it. It is easy. It turns a punnet of strawberries into something quite different. I think it would be perfect for any season, or any time.

If you're ahead of me and have some plum muffins lying about...it would probably go quite well with them too.

Strawberry coconut almond spread
Easy to make, and easy to use.
Vegan.
Food processor required.


Ingredients
250g punnet of strawberries, washed and stems cut off
90g almond meal (1 cup)
50g desiccated coconut (2/3 cup)
1/4 tsp salt
1 tsp vanilla
1 - 2 tbsp water


Method
Process the strawberries in a food processor until puree-like; about 1 minute. 

Add the almond meal, coconut, salt and vanilla and continue processing until smooth, about 2 minutes. Add the water as needed to reach a spread-like consistency and process for another 1 - 2 minutes.

Store in the fridge (not recommended for freezing).


I like rather than love this recipe, on account of liking strawberries a lot when they're fresh but only a moderate amount when they're turned into desserts or sweet dishes. What I do love, however, is the novelty of this spread and how easy it is to make. You can use it as you would jam, or as you would nut butter, which means it is a very versatile product to have around the place.

If only raspberries were cheaper, I might try a raspberry chocolate hazelnut variety next...

Submitted to Healthy Vegan Friday #36.

What are you spreading on things this week?

Sunday, March 24, 2013

Roasted pumpkin and cauliflower with molasses, hemp seeds and quinoa

38 comments
This is a recipe for busy weeks, where time dictates that cooking must be practical but you want it to be fun as well.


It is a recipe for autumn days, where turning your oven on is a novelty after months of avoiding anything that might increase the temperature of your summer-heated house.

It is a recipe for evenings when you want a dinner that will cook itself, giving you time to tap-tap-tap at the computer, or talk to your partner, or perhaps just fold some washing.

It is a recipe for warmth, nutrition, flavour.

It is a recipe for weekends where work is required, and every minute seems to be accounted for.

It is a recipe for sharing, or for keeping to yourself.


It is a recipe for life, whatever it throws up.

I hope you enjoy it as much as I did.


Roasted pumpkin and cauliflower with molasses, hemp seeds and quinoa
Easy, delicious, and can stand alone or pair with a protein-based side
Vegan
Serves 2-3


Ingredients
1 butternut pumpkin
1 head of cauliflower
1 tbsp blackstrap molasses (or other molasses, or maple syrup)
1 tbsp water
1/2 tbsp apple cider vinegar
1 tsp nutritional yeast
1 tsp hemp seeds

1/2 cup quinoa, uncooked

Nuts or seeds, extra, to serve (optional)


Method
Preheat your oven to high (200'C) and cut the pumpkin and cauliflower into chunks. Place in a large oven-proof dish.

Combine the molasses, water, apple cider vinegar, nutritional yeast and hemp seeds in a jar of bowl, and whisk to combine. Pour over the vegetables. Roast in the oven for at least one hour, checking after 30 minutes.

About 15 minutes before the vegetables are ready, rinse your quinoa and then combine with 1 cup of water in a medium saucepan. Bring to the boil. Reduce to simmering, cover, and allow to cook for 10 - 15 minutes until fluffy.

Combine the vegetables and quinoa, and sprinkle with nuts or seeds if desired.


Submitted to Ricki's Wellness Weekend March 28th to April 1st 2013.

What are you eating (or doing) this weekend?

Thursday, March 21, 2013

Cottesloe Sculptures by the Sea, 2013

26 comments

I don't know about you, but this week is out of control at my end. So much to do! Not enough time! Things I remember in the middle of the night! It amuses me that every aspect of my work life can suddenly get busy in the space of 24 hours, when the law of averages would suggest that (say) I don't need to revise and resubmit papers and deal with ethics committees and deal with students all in the same day.

Fortunately, in the midst of the whirlwind, there have been calm moments too. Some came on Tuesday evening when we visited the 2013 Sculptures by the Sea display in Cottesloe, one of Perth's coastal suburbs and beaches. Some of you may remember my 2012 Sculptures by the Sea post.

With apologies to those of you where it is still winter-y, and general apologies for the overcast lighting, here are some photos from our evening visit.


These were like wind-powered flutes...


If you didn't already know this was Australia...this sign would give it away!


A follow-up to a red boy of the same artist last year.

What calm moments have been happening in your week?

Tuesday, March 19, 2013

Purple pikelets with nut pulp

31 comments
The first time I made nut milk at home, I didn't know what to do with the pulp left at the end. To be honest, it scared me a little. It is an odd looking substance. Sort of curd-like, and moist but crumbly. Edible? I didn't think so.

Hmm. No, thank you.

And yet...quite a lot of you told me to add it to baked goods. And so when I made cashew milk recently, I retained the nut pulp and put it in the fridge and thought about what I could do with it.

The answer was a purple version of the small, fluffy pancakes that are Australian pikelets.


I don't know if it was the nut pulp or just a good pikelet-making day, but these pikelets were really, really good. Fluffy. Light. Soft. In all, so highly enjoyable that I'm considering making nut milk again just so I can replicate the experience.

If you aren't into nut milk making, you don't have to go through that step in order to try these yourself. If you're lacking in the nut pulp department (that doesn't read very well, does it?), just use almond meal or hazelnut meal instead. If you don't have those to hand, extra flour would get you by too.


You could also make these with diced apple, and omit the sultanas if they aren't your thing. There are lots of options. I served them with fig jam, but they are also delicious plain, or you could add some nut butter. Or fig jam and nut butter, which I'm now wishing I had thought of when I still had some pikelets left...

Purple pikelets with nut pulp
Vegan
Makes 1 batch of pikelets, about 16


Ingredients
2 small purple carrots, grated (~3/4 cup grated)
1 cup self-raising flour
1/4 cup nut pulp as leftover from homemade nut milk, OR 1/4 cup minus 1 tbsp hazelnut meal, almond meal or extra plain flour
1 cup non-dairy milk, OR 1 cup + 1 tbsp non-dairy milk if using hazelnut/almond meal or extra flour
1 tsp chia seeds
1/2 cup sultanas (small raisins)
1 tsp vanilla
1/2 - 1 tsp cinnamon


Method
Combine all ingredients and stir to combine. Allow to stand for 15 - 20 minutes, preferably in the fridge.

Heat a non-stick pan and drop spoonfuls of mixture on to the pan. Cook until bubbles start to appear on the surface, about 2 minutes, and then flip and cook for a similar time on the other side. Repeat for the remaining batter.

Serve warm. 


I think I am definitely over my fear of nut pulp.

Submitted to Healthy Vegan Fridays #35.

If you make nut or seed milk, do you have a favourite use for the pulp at the end?
Or do you just have a favourite use for purple carrots?

Sunday, March 17, 2013

Aussie Farmers Direct - some positive experiences

28 comments
I mentioned Aussie Farmers Direct in my March In My Kitchen post, and some of you expressed interest in how I was finding it. The answer, in brief, is good. The answer in more extended form is below!

My investigation of Aussie Farmers Direct stemmed from a comment Johanna left when I mentioned crashing my bike, a direct result of trying to cycle home from our local fruit and vegetable markets with too much in my basket. I knew of Aussie Farmers Direct before then, in part because my parents used them for a while and in part as a result of other friends and Lisa at Bake Bike Blog talking about their experiences. For some reason I never looked into them for myself and, as a result, I hadn't realised how much choice there is in what you can order from them.


The company started in 2005 as a way of helping Australian Farmers deliver their food directly to customers. They use the analogy of the traditional milkman, and deliveries are made by local franchises on set days using vans and cooler boxes (for cold produce) or recyclable cardboard boxes (for fruit and vegetables). They pride themselves on distributing 100% Australian owned, grown and produced food, in a way that is sustainable for growers and buyers, is seasonal, and is convenient to customers. You can read more about them on their website.

What I hadn't realised until recently is that there are several ways of ordering from Aussie Farmers Direct. They do fruit and vegetable boxes, which are their best value produce options, but there are several varieties to choose from: a family pack of fruit and vegetables, containing 8-10kg produce ($39); a couples pack of fruit and vegetables, containing 6-8kg produce ($26); a couples pack of vegetables only ($26); a family pack of fruit only ($39); a couples pack of fruit only ($26); and organic versions of the mixed fruit and vegetable boxes ($59 family / $39 couples).


You can have a standing weekly order, but you can also have deliveries fortnightly or monthly, and it is easy to cancel or suspend if you are going to be away. It's all done online, which makes things easy too.

I like choosing fruit and still wanted to do some of our produce buying, so decided to use the couples vegetable only box as my standard order. I did try a mixed fruit and vegetable box the first time, to see what it provided, but my most recent orders have been vegetables only. I have a delivery per fortnight at this stage, so have had just three deliveries to date.


The deliveries thus far have included the following:

- Order 1, a mixed fruit and vegetable couples pack ($26, with a $10 discount for being a new customer)

  • 6 brushed potatoes
  • 1 brown onion
  • 2 carrots
  • 1 zucchini
  • 1 broccoli
  • 1 pak choy bunch
  • 2 tomatoes
  • 1 cucumber
  • 1 gourmet lettuce
  • 2 Pink Lady apples
  • 2 Granny Smith apples
  • 3 plums
  • 2 bananas
  • 3 nectarines


- Order 2, a vegetables only couples box ($26)

  • 2kg bag of Royal Blue potatoes
  • 1kg bag of carrots
  • 3 corn ears
  • 3 brown onions
  • 1 zucchini
  • 1 broccoli
  • 1 red capsicum
  • 1 bok choy bunch
  • 3 tomatoes
  • 1 gourmet lettuce


- Order 3, a vegetables only couples box ($26)
  • 6 brushed potatoes
  • 2 brown onions
  • 2 carrots
  • 1 zucchini
  • 1 broccoli
  • 1 green capsicum
  • 3 tomatoes
  • 1 iceberg lettuce
  • 1 cucumber
  • 1 cauliflower
  • 1 butternut pumpkin


You can also make up a produce box to order only what you want, by selecting individual fruit and vegetable items in a similar manner to ordering online from a supermarket chain. If you do that, the cost is higher than getting a mixed pack, and probably higher than supermarket costs. Aussie Farmers Direct also does bakery items (bread and similar products), meat, dairy (milk, yoghurt, cheese) and a few prepared meal options (salads, pasta dishes, meat dishes). We don't have any need for those, but my parents had a dairy order going alongside their produce order for a while, and found it worked for them.

One of the main advantages for me so far is the variety in the vegetables we receive and thus use. I can't remember the last time I had corn on the cob, and I had forgotten how incredible it is simply boiled and eaten plain. I rarely buy pumpkin despite liking it. I can easily get through three tomatoes in a fortnight if they are delivered to me, but I might only use one if I was buying them myself. I have also found the produce to be fresh and uniformly high in quality. There were a couple of light brown patches on the cauliflower we received last week, but that is quite literally the only blemish we've had to date.

So delicious.

If you don't like lots of vegetables, and/or you buy produce to match a meal plan for the week, then the Aussie Farmers Direct system may have fewer benefits for you. However, the only vegetable both of us actively dislike is cucumber, and I find it easier to plan meals around what we receive than the other way around. For me, being provided with a box of vegetables and then working out how to use them works well.

There are some other disadvantages of the system, but not too many. The main is that we sometimes need more of something than we're provided, or I want a vegetable that isn't provided. I've got around this by having the delivery come fortnightly, which allows me to top-up and/or supplement around it. We get through 1kg of carrots each week, for example, so the 2 carrots in our latest box aren't going to go the distance.

Cost-wise, I do think the boxes work out cheaper, item for item, than buying the same things at regular prices in the supermarket. However, they are a bit more expensive than buying things from local markets or purchasing things on special at the supermarket. I'd estimate the cost difference for those examples at about $5, which may seem fair for having things arrive on your doorstep. Again, having a fortnightly delivery balances that out for us.

Before, we spent $25-$30 per week on fruit and vegetables at the markets, as well as $5-$7 on produce at the supermarket (mostly potatoes and onions, which add too much weight when cycling). In all, our fruit and vegetables came in around $30 - $35 per week.

Now, I seem to be spending about $20 - $25 per week on fruit and the few extra vegetables we need. With the average cost of $13 per week from Aussie Farmers Direct ($26 per fortnight), that takes the total to $33 - $38 per week. That is close enough to our previous costs to seem worthwhile to me.

As a final note, the couples vegetable box we're receiving fortnightly really does last two weeks when topped up with extra bits and pieces. This is the case both for quantity and quality, as vegetables are still fine two weeks later (perhaps as a result of coming fairly directly from farms, rather than going into the supermarket system).

Do you use Aussie Farmers Direct or a similar system? Any positive / negative experiences?

In case it's not automatically clear, this post was written without the knowledge or input of Aussie Farmers Direct and we purchased all of the items we've tried. 

Friday, March 15, 2013

Vegan orange cake, and an orange lesson

38 comments
Last weekend we celebrated my mother-in-law's birthday (yes, another birthday!). As I have made it known that I am always available for birthday cake making, should no one else want that pleasure, I was granted responsibility for the cake.

The request was an orange cake. To my amusement, I later found out that the request would have been for chocolate cake, except that dogs aren't meant to eat chocolate cake, and my mother-in-law has a dog that is included in most edible celebrations. Some might express surprise that dogs can enjoy orange cake, but you don't know the dog in question.


When making birthday cakes for other people, I set my own taste preferences aside. Thus, if it seems difficult to make an enjoyable cake without eggs or dairy, I will make the cake with eggs or dairy. However, there are very few occasions where this proves necessary.

If you want to make an orange cake, it is very easy to find a vegan version. Some simple searching turned up several online variations of an orange cake first published in one of The Joy of Cooking cookbooks. All of the online posts talked about how easy the cake was to make, how moist and tender it was, and how it was enjoyed even by those who weren't vegan and who didn't usually like orange baked goods.


All of that sounded good, and so I made the cake a day in advance, taste tested mixture left in the bowl, and iced it on the day of the celebrations. Making a double-layer cake in two round cake tins that are slightly different in size always makes icing somewhat challenging (I should trim the bottom cake, but what a waste of cake!), but I decided to accept the somewhat messy appearance and generously sprinkle grated chocolate in an attempt to distract from it.


The cake was moist, light, fluffy, delicate, beautifully textured, and very well received by all (including the dog). However, it did not taste of orange. Having used the juice of four oranges in the mix, this was quite perplexing. I am still a little unsure what went wrong, other than that the cake may need zest as well as juice (this was done in one of the three recipes I looked at), and/or I used valencia oranges instead of the navel variety. I usually only buy oranges for juicing, and only for Mr B at that, and valencia oranges are the recommended variety for juice. It is possible that the navel variety are more flavourful for cooking.

Irrespective of the oranges you use, I recommend making my version with the addition of orange zest, or at least doing so if you want an orange flavoured cake. If you want a delicate, faintly vanilla cake you could omit the zest and just enjoy this as we did!


Orange cake
Makes two round cakes
Vegan
Adapted from the orange cake recipes posted on Vegan OccasionsFamily Nature, and Holy Cow Vegan


Ingredients
Cake
3 cups plain flour
2 cups white sugar
1 tsp baking soda
1 tsp baking powder
1/2 tsp salt
1 3/4 cups fresh orange juice (juice of 4 oranges)
2 tbsp orange pulp (as obtained when juicing 4 oranges)
1 tbsp orange zest (I didn't do this but would in future)
2/3 cup vegetable oil
2 tbsp apple cider vinegar
2 tsp vanilla

Icing
3 tbsp non-dairy margarine
~2 tbsp vanilla soy yoghurt
2 1/2 cups icing sugar
1 tsp vanilla
2 tbsp non-dairy milk

Orange-flavoured dark chocolate, optional, for decorating

Method
Preheat your oven to 175'C / 350'F and line two round cake tins with baking paper.

In a large bowl, combine the dry ingredients (flour, sugar, baking soda, baking powder, salt).

In a medium bowl, whisk together the wet ingredients (orange juice, pulp and zest, vegetable oil, vinegar and vanilla).

Add the wet mix to the dry mix and stir to combine. 

Divide batter between the cake tins and bake for 30 - 35 minutes until golden and an inserted skewer comes out clean.

To make the icing, beat the icing sugar and non-dairy spread until fluffy and then add the yoghurt and vanilla and beat to combine.

Grate chocolate and sprinkle over the cake if desired.


Do you have much experience with orange baking?