

Showing posts with label healthy vegan Friday. Show all posts
Showing posts with label healthy vegan Friday. Show all posts
Saturday, June 22, 2013
Amazing satay tofu (coconut milk free)
I have never thought of myself as someone who likes satay dishes. In fact, I would go so far as to say I actively dislike most satay dishes. Except, that is, for this one. I'm pleased to have found an exception.

Friday, November 23, 2012
Homemade hemp seed milk

I remember when Angela at Oh She Glows wrote, in relation to a home composting system, that "my transition into a tree-huggin, hippy, vegan is now complete" (in May 2011).
I am pretty sure that homemade hemp seed milk puts me in the tree-hugging, hippy, vegan category too. There is just no way to make it sound normal. Ricki seemed to agree when she talked about it recently, with her post titled hippie dippy hemp milk.

While it may sound a long way from 'normal', hemp seed milk does seem to be growing in popularity in North America (and with Australians based within North America). Consistent with this, there are quite a few different recipes around for hemp seed milk. Bryanna Clark Grogan includes step-by-step instructions and some possible variations for the process. Most recipes include agave syrup as a sweetener but the ratio of water to hemp seeds varies enormously, from 2:1 (2 cups water to 1 cup hemp seeds) to 12:1.
I decided to follow the ratio recommended in one of my vegan cookbooks, The 30 Minute Vegan (Reinfeld & Murray). This suggests 4 cups of water to 1 cup of hemp seeds and also advises soaking the seeds for four or so hours before blending. Many online recipes skip over the soaking, but I didn't find it too difficult to put the seeds and water in the fridge ahead of time. I didn't bother with the sweetener, figuring I would try it plain first and adjust after if necessary.
The process is really very easy. Basically, you soak your seeds in water then whiz them up in a blender. The pictures below show the transformation, with a fairly dirty looking water with seeds in it (top) being converted to a fluffy, creamy 'milk' (bottom).

If you stopped here, you would still have seeds floating in your milk, so this is where a nut milk bag or cheesecloth comes in. I have seen the bags in various health food stores and they aren't expensive. Simply pour the milk mixture through the bag, with a container underneath to catch the strained liquid, and then squeeze out the seeds that are left behind. It's a fun process.

I did end up with a sludge after the straining, which may suggest I didn't squeeze the seed remnants enough. I will look into possible uses for the leftover seeds in the future, as it felt like a waste to throw them out. (Does anyone have any suggestions?)

When you have strained your liquid, you end up with a thick, creamy hemp seed milk that is ready for hot or cold drinks, cereal, or drinking straight up. Homemade nut and seed milks reportedly keep for about 3 days in the fridge, and I found my version to last well over that time frame.
 |
| Version 1 - super creamy |
I wasn't sure what to expect from hemp seed milk, and was concerned it might be a little bitter. As it turns out, I really, really liked it. It is nutty and a little earthy, but not at all bitter - and keep in mind I didn't add sweetener. It works brilliantly in coffee, and in chai lattes.

I did find the 4:1 ratio to yield a very creamy milk, and I ended up trying to water my first version down. After reading Bryanna Clark Grogan's post I realised that her lighter, 12:1 ratio recipe was probably closer to the sort of milk I usually use (unsweetened almond milk) and more aligned with my tastebuds. The only problem with a 12:1 ratio is that you can end up with a lot of milk, far more than I would get through in three days.
Given the above, I made my second batch with 1 cup of water and just 1 tablespoon of hemp seeds. This gives a 12.5:1 ratio and has the benefit of making a small serve, perfect for one day or so.
 |
| Version 2 - a little thinner |
I found this second version to have a much better consistency, and I think you can tell from the photos that it is thinner. If you like creamy milk then my first batch would probably suit you well, but if you're used to almond milk or skim / semi-skim cow's milk then the second version is more similar to those products.
Basic hemp seed milk
Makes 1 cup; increase ingredient proportions to taste or need
Vegan
Ingredients
1 tbsp hemp seeds
1 cup water
Method
Soak the hemp seeds and water for 4 hours, or longer, in the refrigerator.
Transfer the seed/water mixture to a blender and process until creamy, about 30 seconds.
Strain the mixture through a nut milk bag or cheesecloth, and store in the refrigerator for up to 3 days.
 |
| Hemp seed milk on weetbix, and hemp seed milk in coffee - a good Sunday morning |
To my delight, I have also hit upon consistent success with using non-dairy milks in coffee, which is something I had a lot of trouble with in the past. I now use at least 1/2 cup of non-dairy milk (vs. about 1 tbsp when I used cow's milk) and warm it in the microwave before topping up with hot water. This prevents the curdling I used to experience, and I really enjoy the resulting flavour.
I never would have thought I could enjoy milk, non-dairy or not, but this is one area where I am pleased to admit that I was wrong! I don't see myself drinking it plain any time soon, but I am getting through over a litre a week now (mostly almond milk, when I'm not playing with hemp seeds) and it's a shift I'm very happy with.
I am linking this post into the Healthy Vegan Friday event hosted by Gabby, Shelby and Carrie.
Have you made nut / seed milk at home? Or tried commercial hemp seed milk?
Friday, November 9, 2012
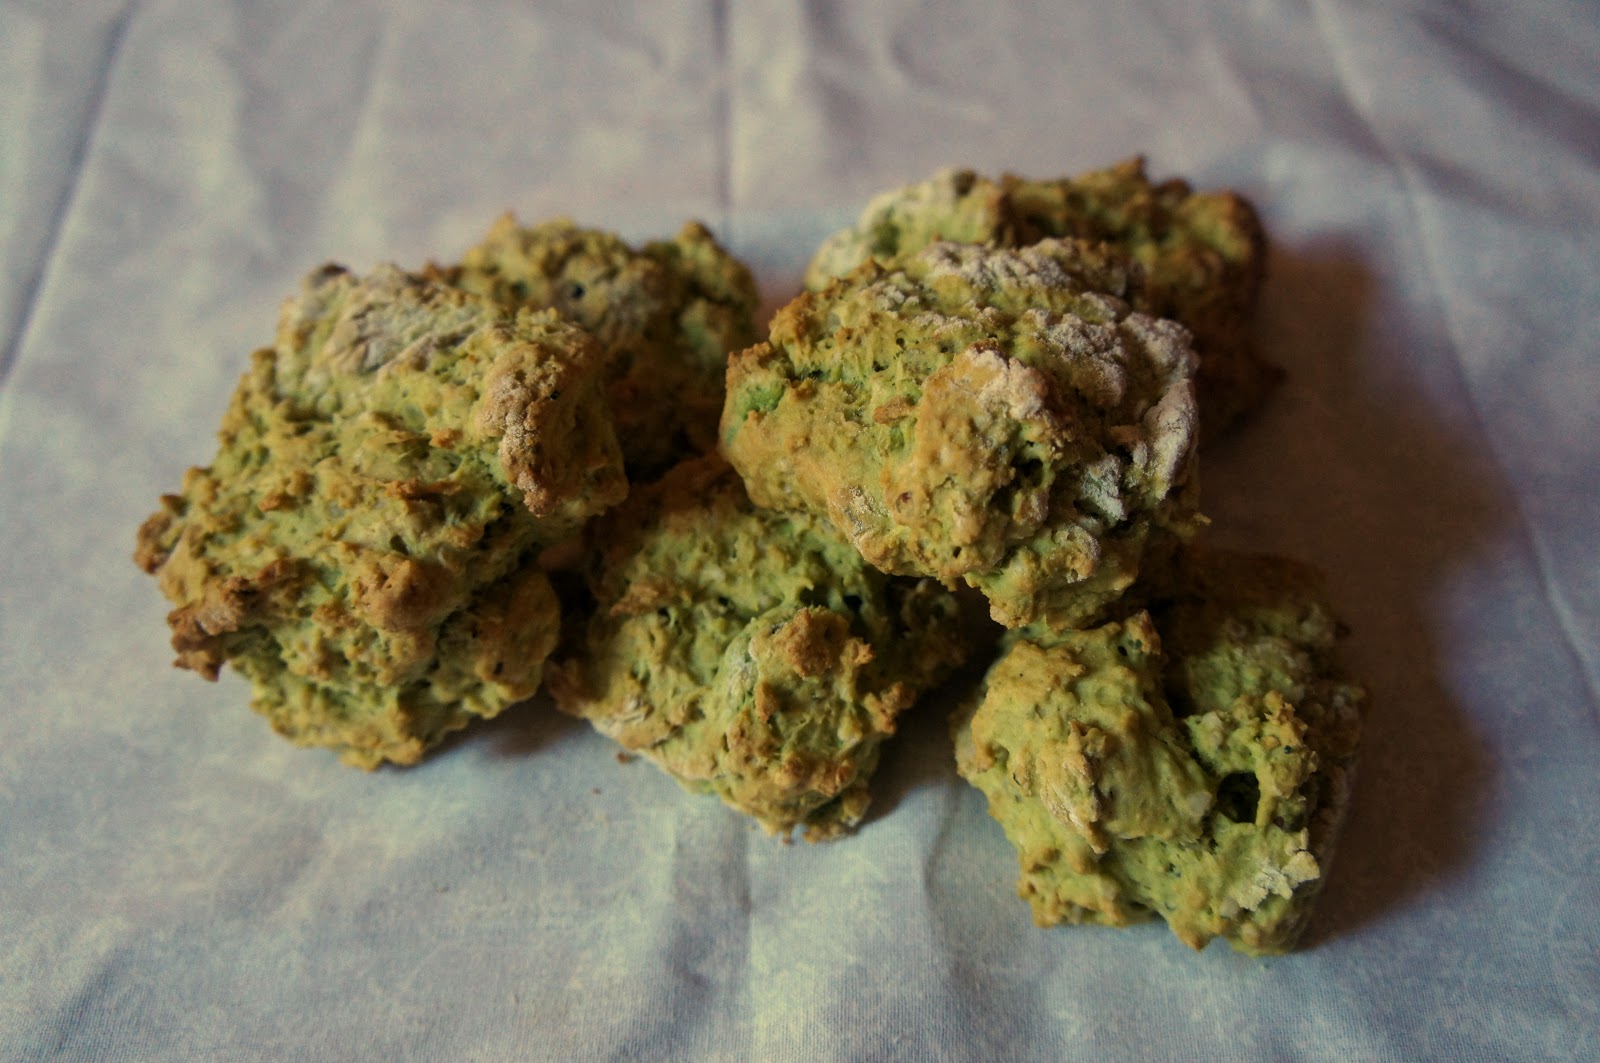
Avocado scones with hemp seeds
After my repeat efforts at making cherry scones last month, I got myself on a bit of a scone roll. Unusually for me, I also branched out to try savoury scones, prompted by a desire to try avocado in the baking process instead of non-dairy spread or butter. I wasn't sure if fruit scones with avocado would work very well, so savoury scones it was.
 |
| Green scones! |
The avocado gave the scones a lighter and fluffier texture than the Nuttelex I'd usually use, and I was thrilled that the green colour came through. I am not sure if you would serve green scones at a dainty high tea, but they were certainly fun to make and to eat. The experience also confirmed my belief that while I don't like avocado in plain form, I do love it in desserts and baked goods.
Complementing the avocado were hemp seeds and nutritional yeast, giving a simple but effective ingredient list. I think some mustard would work too if that is your sort of thing. These had a relatively mild taste that I liked plain or with vegemite or hummus, but if you wanted something sharper then adding mustard or more nutritional yeast should achieve that.
Avocado scones with hemp seeds
Makes 6 - 8 scones
Vegan
Ingredients
1 tbsp apple cider vinegar
1/3 cup non-dairy milk
1 small avocado (100g with skin and stone)
1 cup self-raising flour
1 tsp bicarbonate soda
1/4 cup hemp seeds
1/4 cup nutritional yeast
Method
Preheat your oven to 220'C and line a baking tray with non-stick baking paper.
Combine the vinegar and non-dairy milk and set aside to curdle.
Peel and roughly chop the avocado. Place in a large bowl and add the flour and baking soda. Rub together with your fingers until the mixture resembles fine breadcrumbs. Add the hemp seeds, nutritional yeast and vinegar-milk mix. Stir until just combined and then knead to form a soft dough.
Roll the dough out lightly on a floured surface, to ~2cm thickness. Cut out rounds using the top of a glass dipped in flour or a cookie cutter, and place on the prepared baking tray.
Bake for 15 minutes or until golden.
Now that I have branched out, I think I'll be making savoury scones again. But now that I have tried avocado in scone form, I am also thinking that avocado fruit scones weren't such a bad idea after all...
Have you done much baking with avocado? Or do you have any favourite savoury scone variations?
Friday, August 17, 2012
Healthy vegan Fridays: Teriyaki tofu steaks with cauliflower rice
According to my rough, every-other-day posting schedule, this should have gone out yesterday. However, yesterday I was writing work papers and trying to turn a 20 minutes presentation into a 12 minute presentation. Also, I wanted to link this into the healthy vegan Fridays recipe round up.

I had my doubts about the cauliflower rice, which was born out of a need to use up cauliflower that I foolishly bought with no recipe plans, in large quantities, without anyone in the house to eat it with me. I don't understand my vegetable purchase decisions sometimes.
As it turns out, the cauliflower rice was a perfect match for this dish, to the extent that I may not have liked it as much with regular rice. The cauliflower base was not only lighter than real rice, allowing the tofu to take pride of place, but seemed more flavoursome than rice would have been. It soaked up the sauce flavours and was really quite incredible to eat.


This is the fourth such Friday, hosted by Shelby at Everyday Vegan Girl, Gabby at the Veggie Nook, and Carrie at Carrie on Vegan. Whilst it's the first I've participated in, I am a fan of the concept and will try to link my relevant recipes in when applicable.
Today's recipe involves some processed ingredients, but also captures much of what I love about vegan dishes. Easy. Incredibly delicious. Fun. Packed full of vegetables. And yes - healthy.

I had my doubts about the cauliflower rice, which was born out of a need to use up cauliflower that I foolishly bought with no recipe plans, in large quantities, without anyone in the house to eat it with me. I don't understand my vegetable purchase decisions sometimes.
As it turns out, the cauliflower rice was a perfect match for this dish, to the extent that I may not have liked it as much with regular rice. The cauliflower base was not only lighter than real rice, allowing the tofu to take pride of place, but seemed more flavoursome than rice would have been. It soaked up the sauce flavours and was really quite incredible to eat.

My only (minor) complaint with this dish is that it was slightly too salty for my low-salt preferring taste buds. I may reduce the soy sauce slightly next time, or if you use reduced sodium soy sauce that would work well.
Such minor changes aside, I will, without a doubt, be making this again!

Teriyaki tofu steaks with cauliflower rice
One of my favourite meals to date for 2012
Teriyaki sauce adapted from the teriyaki tofu in Peas and Thank You (the book)
Vegan
Serves 3
Ingredients
500g (1 1/2 blocks) firm tofu
1/3 cup soy sauce (I might use a little less next time)
1/3 cup water
2 tbsp mirin (or rice vinegar)
1 tbsp finely chopped fresh ginger
3 1/2 tbsp brown sugar
1 tbsp cornstarch
1/2 cauliflower, roughly chopped into florets and tough stems removed
1 medium carrot, thinly sliced
1 medium capsicum, thinly sliced

Method
Slice your tofu into six thick 'steaks'. If you're using regular sized tofu blocks, one block gives four steaks.
Press the tofu steaks using a tofu press (if you have one) or for at least 15 minutes between tea towels and chopping boards, under a pile of books (if you're like me).
While the tofu is pressing, combine all of the teriyaki sauce ingredients in a bowl or jar and whisk to combine. The mixture will thicken on heating.
Place your tofu steaks in a shallow baking dish and cover with half of the teriyaki sauce mixture. Allow to marinate for at least 30 minutes. Set the remaining sauce aside.
To make the cauliflower rice, process the cauliflower in a food processor until crumbly and rice-like in appearance. (If you don't have a food processor, you could try mashing it but I haven't tried that. You could also use regular rice.)
When the tofu has marinated, heat a non-stick pan over medium-high heat. Cook the tofu steaks for ~12 minutes, turning every few minutes, until crispy. Remove the tofu from the pan and allow to stand while you cook the vegetables.
Add the carrot and capsicum to the non-stick pan, along with a few tablespoons of the remaining teriyaki sauce. Stir fry for ~5 minutes. Then reduce the heat to low-medium and add the cauliflower rice and the remaining teriyaki sauce. Stir regularly for a further 2-4 minutes.
Return the tofu steaks to the pan to heat through, and then serve.

I think I may be in love with this dish. It could become one of the few recipes that I force myself to follow exactly for re-makes, so I don't deviate off and ruin the result.

It is definitely my favourite way, ever, to eat cauliflower!
Do you enjoy cauliflower rice? What about tofu in large serves, as here?
Subscribe to:
Posts (Atom)