One of the things on my
5 Things I Would Like To Make list was non-dairy yoghurt. After some months of experimentation, I am pleased to finally have some things to report. Not all
good things, mind you, but things nonetheless.
If you dislike yoghurt then I'm afraid this post may not be the one for you. However, if you do, and/or if you might want to make yoghurt yourself one day, I hope some of the following may be of use.
The background
Why did I want to make yoghurt at all? After discovering that gelatin was in almost all of the commercial yoghurts sold in Australia, I switched a few years ago to favouring the natural pot-set yoghurt varieties. Comparing typical commercial yoghurts with natural pot-set yoghurts (
Jalna is a particular favourite) is like comparing a Mars bar with quality dark chocolate. They aren't the same at all, and whilst the latter in each comparison is probably an acquired taste, I well and truly acquired a preference for pot-set.
The problem with this switch is that, over time, it became harder and harder to find my preferred brands. Where pot-set varieties were available, they were increasingly of the flavoured sort, and I was having to invest more and more effort to track down the type I liked. Driving to a supermarket with the specific goal of buying yoghurt was getting a little frustrating.
This supermarket inconvenience corresponded with my experimentation with reducing dairy, and so the idea of making non-dairy yoghurt was born.
For reference, I shall note here that a 500g tub (0.5L) of natural pot-set yoghurt usually cost in the vicinity of $4, or a little higher, when bought from the supermarket. Let's see if we can beat that $8 / 1L benchmark, and achieve just as good a result...
The first step - cheating
Although my goal was to make non-dairy yoghurt, I actually started at the other end of the spectrum. So much so that instead of making non-dairy yoghurt from scratch, I was making dairy yoghurt from a sachet. It doesn't sound quite the same does it?
I invested in an EasiYo yoghurt maker, which is effectively a 1L jar and a larger thermos-type thing in which the yoghurt sits while it is fermenting. These cost about $20, and the EasiYo products seem to be available in a number of shops in Western Australia (in my case, I found that Big W had the biggest range of yoghurt sachet options, designed to go with the yoghurt maker).
To my slight embarrassment, I picked the 'Skimmers' EasiYo sachets as what seemed like the closest to the yoghurt I usually buy. I would have preferred a different name, but there you go. There are plenty of flavoured options too, if you prefer something with a better title and/or with added sugar and flavour (there is also a Greek-style option).
The ingredient list of the Skimmers variety is nice and short: pasteurised skim and whole milk solids (98%), from free range cows, and live lactic cultures.
There is no real challenge in making this yoghurt. You pour a sachet into the 1L jar, fill it half way up with cold water, put the lid on, shake, continue filling the jar up with cold water, shake again, fill the thermos thingy up half way with boiling water, put the 1L jar in the thermos, put the lid on, and wait.
You can wait anywhere from 8 hours until (reportedly) 24 hours - I've settled on about 12 hours as my favourite time frame to get the yoghurt nice and thick.
The verdict on this cheating option? Perfection in a bowl. Seriously. And despite how easy it is to make, there is still a strong sense of satisfaction at making the yoghurt yourself.
A 3-pack of sachets costs $9.95, so the
cost for 1L made this way is $3.32. In other words, less than half of the price of commercial yoghurts.
The second step - still on dairy
It took me a little while to work my way up to my non-dairy aspirations. After trying out the sachets, I thought I would try doing things 'properly', using skim milk powder and a yoghurt starter.
Brydie talked about this recently, using the same EasiYo containers. My approach was virtually identical to hers, with 1.5 cups of milk powder and about 2 tablespoons of yoghurt as the starting ingredients. You mix those up with water, in the 1L jar, and then go through the same process as with the sachets.
I used skim milk powder for this rather than full-cream, and I think a mixture of the two may work slightly better than skim alone.
My verdict on this, when made with skim milk powder, is that it wasn't quite as thick as the 'cheat' option (or the store bought varieties). Whilst it was still delicious, I was left preferring the sachet overall.
This does have the advantage of being very economical though, coming in at about $1.50 - $2 per 1L - and I suspect that using some full-cream milk powder would make it thicker if desired.
The third step - choosing a non-dairy option
When I was finally ready to enter non-dairy territory, I was faced with the challenge of choosing precisely
what non-dairy option to pursue. I knew I didn't want to make soy yoghurt, as I like to vary things away from soy whenever possible (given it is the default non-dairy option available commercially). For those who are interested in making soy yoghurt, though, some links are at the end of this post.
The
non-dairy milk comparisons I blogged last month were actually part of this decision-making process, as I wanted to start with a milk that I liked the taste of and (ideally) which contained reasonable amounts of protein and calcium.
Based on those comparisons, I decided to try protein-enriched rice milk and coconut milk yoghurts.

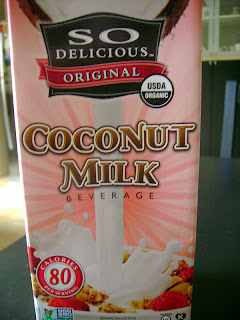
The coconut milk didn't have the protein or calcium content I was hoping for, but I thought the slightly higher fat content might be useful for yoghurt-making, and I knew that
others had made coconut milk yoghurt successfully before.
The fourth step - rice milk yoghurt
For this, I mixed about 1/4 cup soy vanilla yoghurt (as a starter) with nearly 1L of the Vitasoy protein enriched rice milk pictured above - enough milk to fill up the 1L jar, when mixed with the starter yoghurt. The 1L jar went inside the EasiYo thermos half filled with boiling water, and was left to ferment away.
I actually left this for over 14 hours, as I found it didn't thicken as readily as the dairy variety. Even with the slightly longer standing time, the final product was still, if I'm honest, more like drinking yoghurt than yoghurt. Very good with cereal, but not so much in a bowl on its own.
Whilst some separation of liquids is normal with pot-set yoghurt (as the whey separates from the yoghurt), this was also more marked with the rice milk variety:
I do wonder whether spooning off the top whey layer would have made the overall product thicker, but I just kept stirring the two layers back together. I think the separation is probably related to the amount of yoghurt starter, which is somewhat of a
moving target when making yoghurt at home. In this instance I may have used a little too much soy yoghurt at the beginning.
All in all? The tart yoghurt taste was there, and it was thicker than regular rice milk, but it wasn't at all like dairy yoghurt. With that said, I did like it, and will continue to play around with this to try and get the proportions right and reduce the whey-yoghurt separation.
This option works out to be about $3 per 1L. Still big savings!
The fifth step - coconut milk yoghurt
I had such high hopes for this. After my experience with the rice milk yoghurt being a bit too thin, I added 1 tsp agar-agar flakes to the ingredient list, in an attempt to thicken the final product. The agar went into the 1L EasiYo jar with 1/4 cup soy yoghurt starter and just under 1L coconut milk, to ferment in the thermos in the same way as above.
Sadly, this was a dismal fail. In every sense possible.
The whey-yoghurt separation was so pronounced that the 'yoghurt' was extremely odd to look at and far too off-putting to even taste:
Not quite what I was looking for.
I'm unsure if the problem here was not enough sugar for the yoghurt bacteria to breed on - as the coconut milk was lower in sugar than some of the other non-dairy options (and than regular milk) - or whether it was the soy yoghurt starter. I know that some people use commercial powdered yoghurt starter to make yoghurt at home, which I guess is similar to what comes mixed into the EasiYo sachets.
I do wonder if that would work better than guessing at soy yoghurt quantities, especially as it would also be a 'purer' source of the live cultures. Also, I don't know if soy yoghurt and coconut milk go together particularly well, and if not, trying to combine them here may not be sensible. Unfortunately, I've not been able to find the powdered yoghurt starter and am reluctant to order it online when it may not prove to be any use.
All in all, then, this did not inspire me to pursue coconut yoghurt! It was also rather an expensive mistake, considering the $5 price tag per 1L carton of coconut milk (albeit still cheaper than store-bought yoghurt). I know that coconut milk yoghurt is possible, but I may take a break to re-gain confidence before trying it again...
The sixth step - reflection
Interestingly, after this process of experimentation, I went back to the EasiYo sachets (I had two left) and fell in love with yoghurt all over again. After trying the slightly thinner options that came from skim milk powder and rice milk, the EasiYo result was noticeably thicker and more enjoyable.
As the sachets don't require a yoghurt starter to be on hand (useful given that I'm happy to have a few days off between yoghurt batches, and don't really want to keep buying soy yoghurt to start things off), and the ingredient list is short enough to seem 'almost' from scratch, I suspect that this cheating option may in fact remain my default. It isn't dairy-free, in fact quite the opposite, but this may be a time where I need to acknowledge that real milk does have its place.
With all of that said, I will continue trying rice milk yoghurt and if I ever see powdered yoghurt starter I will re-commence experimentation. I'm certainly glad I went through this process and I love the fresh taste, the reduced cost, the reduced packaging, and the ability to have the resulting yoghurt plain or mixed in with any flavours or add-ins as desired.
For other references on yoghurt making, I collected the following bookmarks -
Soy:
Coconut:
Nut:
Oat:
Dairy:


