Showing posts with label bite-sized thoughts. Show all posts

Tuesday, March 11, 2014

Vegan hazelnut praline chocolates, and spread - for 3 years of blogging

36 comments
Today, Bite-Sized Thoughts turns three. I thought we could celebrate with chocolate.


I have commemorated previous blog anniversaries with raw dishes. In year one, there were three different types of raw vegan cheesecake (that post is still one of my favourites!) and in year two, there was raw sushi and raw chilli-cinnamon-sea salt chocolates.

When thinking about what to make this year, I was struck by my comment on raw food in last year's anniversary post: it is, to me, like kitchen alchemy. At heart, that is what I love about blogging. The magic of kitchen creations - and in my case, creations without animal products.

Today's recipe is not raw. However, I think it captures kitchen alchemy perfectly. The picture below shows the transition from whole hazelnuts to creamy hazelnut butter, in what may well be chemistry and physics at their best. 

Clockwise from top left: Roasted hazelnuts; shelled hazelnuts pre-processing;
after 5 minutes of processing; after 10 minutes of processing

Monday, March 11, 2013

2 years of blogging, raw sushi, and raw chilli-cinnamon-sea salt chocolates

52 comments
Today marks two years since Bite-Sized Thoughts started. I have taken it as an opportunity for reflection and for edible celebration.

Raw vegetable sushi and raw chilli-cinnamon-sea salt chocolates.

On the reflection side of things, I continue to get a lot of pleasure from blogging and the blogging community. I am more creative in the kitchen than I was two years ago. I know a lot more about vegan and vegetarian cooking and eating, and have seen my eating preferences and patterns change and evolve. I have met (in a virtual sense) people with whom I feel a huge amount of connection, especially when considering that our interactions are limited to online comments and discussions.

From a blog perspective, the last year saw me switch from my blogspot address to bitesizedthoughts.com, create a (very basic) favicon for the blog, and start participating in link-up events like Ricki's Wellness Weekends, Healthy Vegan Fridays, Cityhippyfarmgirl's 'loving this week' posts, and Celia's In My Kitchen series. More recently, I changed my header again and learned how to do drop-down menus.

Bite-sized thoughts version 1 (2011-2012)

According to Google Analytics, the most frequently viewed posts in the last year were:
  1. Body image and eating disorders awareness week (posted September 2011)
  2. Les Mills Body Attack (posted July 2011)
  3. Making non-dairy yoghurt (November 2011)
  4. Sweet potato chickpea and hemp seed veggie burgers (posted August 2012)
  5. Vegemite, Marmite and Promite (November 2011)
  6. Raw vegan cheesecake, three ways (my one year anniversary post, March 2012)
  7. Thai fish cakes, vegetarian style (March 2012)
  8. Treehouses (May 2012)
  9. Raspberry and white chocolate muffins, for my parents (October 2011)
  10. Vegan lemon slice for a modern afternoon tea (June 2012)

I think we all have a list of amusing search terms that somehow led someone to our blog. In the last year, some of the more amusing phrases to lead here include...

  • "Yılbaşı yemekleri."  Apparently, this is Turkish for New Year's Eve dinners. How and why multiple people have used it to search for this site is beyond me.
  • "New york times white bean pasta."  I'm pretty sure no New York Times recipes are on my blog. And hardly any pasta ones.
  • "Are fish cakes vegetarian?"  Um, no. 
  • "Good thoughts in english with images."  What?
  • "Bicep hurts shooting basketball."  This one I understand. I feel your pain.
  •  "Bite hair."  I don't really want to know what this is about.
  • "Green and black's dark chocolate tastes like liquorice?"  No, it doesn't, but now I wish it did.
  • "How do I know if I broke my toe."  Frankly, I don't think I'm the person you should be asking...


Bite-sized thoughts version 2 (2012-2013)

Moving to the edible part of today's post, I realised that I set the bar a bit high last year by making three types of raw vegan cheesecake for my one year blog anniversary. Such foolish enthusiasm! I don't have three varieties of raw vegan dessert for you today, but I decided to stick with the raw theme for the simple reason that I find it fun. My diet is not predominantly or even mostly raw, but I find that making raw vegan dishes is even more rewarding than making vegan ones. It is like kitchen alchemy.

Raw sushi must be one of the easiest raw dishes to make, although I got into a muddle about whether mirin and rice wine vinegar are technically raw or not. (Usually I wouldn't worry, but if I was calling this raw, I wanted to make sure it actually was.) My version uses tahini for flavour and carrot, capsicum and watercress as vegetable fillings. If you like avocado, that would be a great option to include too.

My sushi is always messy and this raw version is no exception. For images of neater raw sushi, I recommend the pictures in Hannah's recent post on Wayfaring Chocolate!


Raw vegetable sushi
Makes 2 large handrolls, or 10 large slices.
Raw and vegan.
Food processor required.


Ingredients
1/4 head cauliflower
1 tbsp apple cider vinegar
1/4 - 1/2 tsp agave nectar (to taste)
Pinch salt
2 tbsp unhulled tahini
2 sheets nori (dried, not roasted)
1 medium carrot, cut into thin slices
1 small capsicum, cut into thin slices
A thick handful of watercress

Method
Process the cauliflower in a food processor until fine and rice-like in texture. Mix through the apple cider vinegar, agave and salt and rest in the fridge for at least 30 minutes.

Take one sheet of nori and lay flat on a chopping board, or sushi mat if you have one (I don't). Spread approximately half of the cauliflower mix over half of the nori sheet, leaving an inch at the bottom edge and several inches at the top edge. 

Spread 1 tablespoon of the tahini over the cauliflower, and then place your vegetable fillings in a row towards the bottom of the sheet. Roll up and seal nori edges with water as required.

Repeat for the second nori sheet. 

Slice and serve.


This is, obviously, different in texture and flavour to rice-filled sushi. If you don't expect a like-for-like substitution, I think most people would enjoy it. It is certainly an easy way to boost your intake of vegetables, and I think the mix of cauliflower rice with fruit fillings would be an enjoyable combination too. I'd also like to experiment further with including dried herbs and seasonings in the cauliflower mix.

Raw sushi is all well and good, but I will confess to being more excited about the second dish I made. These individual raw chocolates are made with cocoa butter, cocoa nibs, cocoa powder, chilli flakes, cinnamon and sea salt. I loved them.


Before looking into raw chocolate making, I didn't really have any idea how it was done. It turns out that it's surprisingly simple. You need to invest in cacao butter, and may also want to purchase cacao nibs, but you're likely to have most of the other necessary components in your kitchen. What is more, while I spent $30 on the cacao butter, nibs and raw cacao powder, those purchases should allow me to make another 3 or 4 batches similar to the one below. This places the cost per 100g of chocolate in the region of $4 - $5, including the cost of other ingredients, whereas commercial raw chocolate costs at least $10 per 100g (around me anyway).

Raw cacao butter and raw cacao nibs.

Cost aside, there are other advantages to making chocolate this way yourself: it is really fun, and you design your flavour. The following recipe takes you through what I did, but you can modify the cocoa percentage and the flavour add-ins to taste.

Raw chilli-cinnamon-sea salt dark chocolate
Makes about 240g, or 24 small chocolates.
Raw and vegan.
71% cocoa content.
Inspiration drawn from Choc Chic's simple raw chocolate recipe
Indigo Herbs post on how to make raw chocolate
and the chocolate making process outlined on Pana Chocolate.


Ingredients
60g (~1/2 cup) raw cacao butter
80g (~3/4 cup) raw cacao powder (or regular / roasted cacao powder, if preferred)
30g (~1/4 cup) raw cacao nibs (or more cacao powder)
65-70g (~1/4 cup) agave nectar
1 tsp vanilla
1 tsp sea salt
1 tsp cinnamon powder
1/2 tsp chilli flakes (or to taste)

Method
Lay out individual silicon moulds for setting the chocolate in, or use cupcake liners if you don't have moulds available.

Create a double-boiler system by placing a glass dish on top of a large saucepan half-filled with water. Heat the water over low heat.

If you want to ensure the chocolate is raw, use a candy thermometer to monitor the temperature of the glass dish and ensure it stays below 42'C / 108'F. If you aren't worried about the raw aspect, keeping the water in the saucepan below simmering point should approximate a temperature below 42'C anyway.

Add the cacao butter to the glass dish and stir regularly until it has fully melted. This step may take up to 5 minutes.

When the cacao butter has melted, add the cacao nibs and cacao powder. Stir until dissolved (the nibs will still be identifiable).

Add the agave and stir until incorporated, and then add the vanilla, sea salt, cinnamon and chilli flakes (or other flavourings to taste).

Transfer into your moulds / cupcake liners and set in the fridge for at least 2 hours.

Left to right: Cacao butter in unmelted form; melted cacao butter; liquid raw chocolate.

I can only describe this chocolate as wonderful. I am sure I am a little biased, and I'd love it if you tried a version out yourself and let me know how you got on. For now, though, let me say that if I bought this in a shop I would definitely buy it again.


The chilli gives a subtle kick without being overpowering, the sea salt comes through in waves, and the cinnamon is only just detectable but works to brings the different flavours together. The nibs provide a subtle texture contrast and the chocolate is dark and deep and slightly sweet. I think the texture of the cacao nibs also helps to avoid (or, perhaps, to distract from) the grittiness that sometimes accompanies raw chocolate.

I can not wait to make more, and to try different flavours.


Happy two years from bite-sized thoughts!

Thank you to each and every one of you who stops by, leaves a comment, or lets me know that you've tried out a recipe - you all contribute to the pleasure I get from blogging and blog reading.

Friday, December 28, 2012

An end of year recipe round-up: My 2012 favourites

16 comments
With 2012 rapidly drawing to a close, it feels like a time for reflecting and for looking ahead. I will be doing another post that looks at 2012 and all it has involved (and it has involved so much!) but for now - I am focusing on food. It's easier.

Here are some of the dishes that I have most enjoyed making and eating this year, in sweet and savoury form. I would love to hear your favourite 2012 meals too, either from your own blog or elsewhere!

Sweet things

Bakewell tarts (vegan)


Ugly Duckling Muffins (vegan, low-fat)


Savoury things


Celeriac fries (vegan)


What are some of your favourite recipes from 2012?

Sunday, March 11, 2012

Raw vegan cheesecake, three ways

28 comments

I'm quite excited about this post.

Part of this excitement is about sharing my experiments with raw vegan cheesecakes. It has been a lot of fun.

Part of it, too, is that today is the one year anniversary of Bite-Sized Thoughts starting.

A lot has happened in the year, and I have certainly learnt a huge amount. At the same time, it has gone quickly - I now can't imagine not blogging, but it doesn't feel as if I've been doing it for 12 months. I have truly come to love the blogging world and the process of organising my life and recipes (or some components thereof...) into blog form.

The three recipes I've chosen to post today capture so much of what I enjoy about cooking and food. They also capture a lot of what I enjoy about veganism. Of course, part of my enjoyment of vegan food stems from the are health and environmental benefits (as I see them anyway) and the ethical issues around animal produce. But it is also magical. That you can take natural, 100% plant-based foods and turn them into cheesecake - it is staggering. It captivates me and entertains me, and makes me very happy indeed.

I hope that these recipes might make you happy too.

All of them make 4 servings, so the quantities are small ones. I made mine in two individual, medium sized ramekins, and the pictures are of one of the resulting small cheesecakes. Doubling the ingredients would give a single larger cheesecake to serve 8 or so people.

All recipes can be found in streamlined version here.

For the non-streamlined version, let's start with chocolate.


Now the thing is, I don't actually like (regular) cheesecake. This is hardly surprising when you consider that I don't like creamy, cheesey, or milky dishes - cheesecake is like my horror dessert. The base I usually like; the filling is usually not my friend.

This does raise the question of why I have made three versions of vegan cheesecake.

Why? Well, I thought they might be different. Perhaps cheesecake without cream, without cheese and without milk would be cheesecake that I do like?

Despite this reasoning, it did seem safest to start with chocolate - that, I rarely dislike.


The inspiration for this first recipe, a chocolate raspberry cheesecake, came from various chocolate avocado desserts. I'm not sure what made me think I could convert 'dessert' into 'cheesecake', but this product did seem pretty cheesecakey to me (although, granted, I am a non-cheesecake eater...).

It was certainly creamy. Dense. Rich. Slightly but not very sweet. Most definitely chocolatey. In typically cheesecake form, the filling was also nearly too creamy and dense and rich. But - and here is the key! - it was nearly but not quite. Vegan won the day and small slices worked very well indeed, filling and all.


Chocolate berry cheesecake

Serves 4


Ingredients
Base
1/2 cup raw almonds
1/4 cup dates, pitted and roughly chopped
Water as needed (I used about 1 tsp)

Filling
1 medium avocado (mine was ~120g flesh)
1/2 cup frozen raspberries
1 tbsp agave or maple syrup (use 1 1/2 tbsp if you want a sweeter taste; this version was just sweet)
2 1/2 tbsp good-quality cocoa

Topping
1/2 - 1 cup frozen raspberries, thawed

Method
Line two individual ramekins or a small pie dish with cling wrap.

Process the base ingredients until finely processed and starting to clump together. Add water if needed to get a thick and sticky consistency. Press the mixture into the bottom of your ramekins / pie dish.

Process or beat all filling ingredients until smooth and well combined. Divide between the two ramekins and cover with cling wrap. 

Set in the freezer for 2 hours and then serve with the extra thawed raspberries.
or
If making in advance, this will keep in the freezer for at least 3 days (longer if stored in an airtight container). Before serving, allow the cheesecake to thaw slightly at room temperature (15 - 30 minutes), and then top with the extra thawed raspberries. 


I don't think you can go wrong with chocolate and berries. This was certainly not wrong and I liked it very, very much indeed. I suspect it will be featuring again.

For my second cheesecake, I wanted to make a version of the lavender and lemon cheesecake featured on This Rawsome Vegan Life. Lavender as a baking ingredient has intrigued me for some time, and this seemed like as good a time as any to jump into trying it.


Except, I couldn't find any dried lavender. Frustratingly, I had seen it at a supermarket a few months back, but on re-visiting it they no longer stocked it. Neither did anywhere else I looked. In the end, I gave up.

I bought this instead, in an effort to console myself for the lavender-less trips:


Perhaps vanilla bean paste would be just the thing to make the perfect vegan cheesecake?

I changed my inspiration sources and settled on honey, vanilla and pistachio instead of lavender and lemon.


It seemed like a promising flavour combination, but the result wasn't quite as I had hoped...


'Honey', vanilla and pistachio cheesecake 
(use agave to make this vegan)

Serves 4
Inspired by this honey-pistachio cheesecake topping on Taste.com.au, and
the honey ingredient in the lavender lemon cheesecake on This Rawsome Vegan Life

Print recipe

Ingredients
Base
1/4 cup pistachios
1/4 cup almonds
1/3 cup sesame seeds
1/4 cup dates

Filling
1 cup cashews, soaked in water for at least 4 hours

1/3 cup raw honey or agave (I used half of each, for no real reason other than wanting to conserve the more expensive agave but not wanting to finish off our honey) - I would use less than this in future
1 tsp coconut oil
1 tsp vanilla bean paste
2 tsp lemon juice

Topping
Extra pistachios, optional

Method
Line two individual ramekins or a small pie dish with cling wrap.

Process the base ingredients until finely processed and starting to clump together. Press the mixture into the bottom of your ramekins / pie dish.

Process or beat all filling ingredients until smooth and well combined. Divide between the two ramekins and cover with cling wrap. 

Set in the fridge or freezer for 2 - 4 hours and then serve with the extra pistachios
or
If making in advance, this will keep in the fridge or freezer for at least 3 days (longer if stored in an airtight container).


As alluded to above, I didn't like this at all. Perhaps it was my persisting fixation with lavender or perhaps it was that this was too close to a typical cheesecake - when it was set in the fridge, I didn't like the texture of the filling at all, being creamy and squishy and just not to my tastes.

Setting this in the freezer improved the consistency, and I found that it didn't turn solid even when frozen overnight. I still didn't enjoy the flavour though. It was too sweet, for a start - I would use much less honey / agave in future - and it was also vaguely nutty. I like nuts, but I didn't like the cashew undertones here.


Definitely a failure, at least for m7 tastes.

It did, though, provide the motivation for moving on to version three...


I still really wanted lavender and in the end I picked some from a neighbour's garden (!). I'm sure this isn't the approach one should take, but the lavender was already semi-dried by the summer sun; some time in a sunny spot in the kitchen dried it out further.

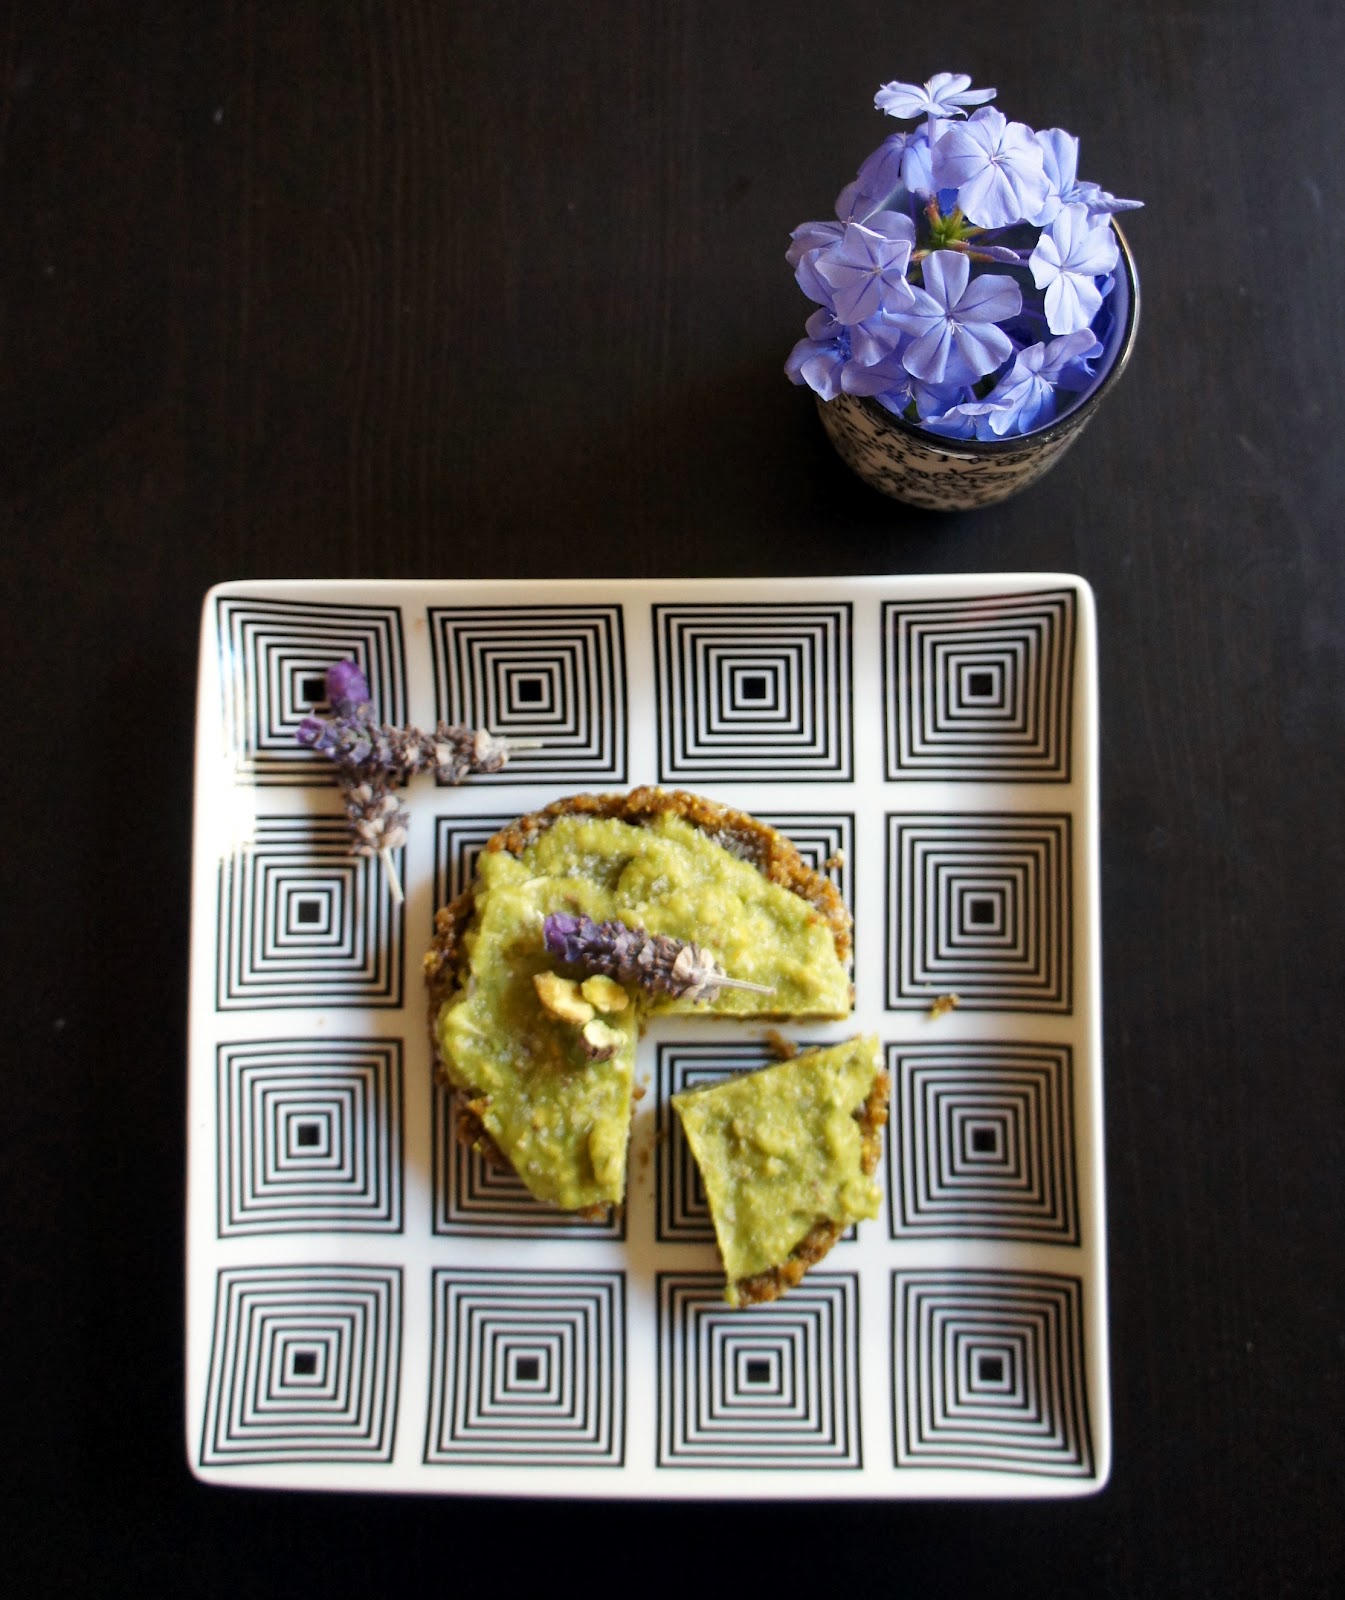
For this cheesecake, my challenge was in deciding what 'cream' base to use. Cashews seem to be a standard approach, but I was no longer keen on those after my negative experience with the version above. I had liked the result with avocado in the chocolate raspberry cheesecake, but I didn't really want a green lavender and lemon cheesecake.

In the end, though, that's exactly what I went for.


I could have made this lavender and lime, which would have made the colour appropriate, but I was keen on  lemon. I decided that retaining pistachios in the ingredient list would be my nod towards making the colour semi-appropriate, and so ended up with lavender, lemon and pistachio.

Lavender, lemon, and pistachio cheesecake

Serves 4
Adapted from lavender lemon cheesecake on This Rawsome Vegan Life

Print recipe

Ingredients
Base
1/4 cup pistachios
1/4 cup almonds
1/4 cup dates

Filling
1 small - medium avocado (mine was ~100g flesh)
1 tsp chia seeds
1/8 cup lemon juice
2 tbsp agave
1 tsp vanilla extract
Petals of 1 dried lavender stalk (~1 tsp), crushed
2 tsp dessicated coconut
Pinch salt

Topping
Extra pistachios, optional

Method
Line two individual ramekins or a small pie dish with cling wrap.

Process the base ingredients until finely processed and starting to clump together. Press the mixture into the bottom of your ramekins / pie dish.

Process or beat all filling ingredients until smooth and well combined. Divide between the two ramekins and cover with cling wrap. 

Set in the freezer for 2 hours and then serve with the extra pistachios
or
If making in advance, this will keep in the freezer for at least 3 days (longer if stored in an airtight container). Before serving, allow the cheesecake to thaw slightly at room temperature (15 - 30 minutes).


I loved this.


Really, truly loved it.

It was definitely magical. The green colour almost made it more so. It looked like an pea-inspired dessert, or something equally odd, but tasted like a dream.


With flavours of lemon and just slight lavender, this had just the right sweetness and creaminess.

I made Mr Bite try this one. He was very perplexed by the colour and ate his trial mouthful with his eyes closed. However, even he gave it positive feedback - and green, raw, vegan cheesecake with lavender in it is certainly not something I would expect him to review positively!

He thought it tasted like lemon cheesecake, and that the texture was cheesecake-like - somewhat of a relief given that he does enjoy normal cheesecake and is a better judge of 'cheesecake-ness' than I am.

Interestingly, he couldn't detect the lavender flavour but stated he didn't like 'the aftertaste'. I found the lavender to hit after the initial lemon notes, so suspect this aftertaste was the lavender. If you're not sure about lavender, perhaps half a stalk would be a good starting amount...for myself, I really enjoyed the subtle flavour hit and will be experimenting with this again.


This is a very long post, and if you are still reading - thank you, and I hope some of the above was entertaining to you as well as to me. I had great fun with these creations and I hope to have many more experimenting sessions as this blog goes into year two...

What do you find magical in the kitchen? Have there been dishes you've really enjoyed playing with?

I am linking the chocolate raspberry cheesecake into Ricki's 2013 Valentine's Day Wellness Weekend (14th-18th February 2013)...because really, what more could you want on Valentine's Day?