Thursday, November 10, 2011

Friends, babies, and vegan chocolate mint cupcakes

16 comments
This week, I...
  • Received an invitation to a(nother) baby shower in December;
  • Had workplace farewells for a work friend who is going on maternity leave with her second child;
  • Have another friend (the one of the first baby shower) due to deliver her baby literally any day, with an induction booked for tomorrow if things don't start before then; and
  • Have a wedding to attend with Mr Bite tomorrow night. For one of my friends, naturally, because my social circle seems to be the one who is marrying and breeding!

Can you guess that I am in my mid, rapidly heading towards late, 20s?


The nice thing about this week is that unlike this experience, and this one, I am not making unfair comparisons between my friends who are marrying / having children and myself. I am genuinely excited about meeting the new babies that are soon to be born, and recognise that it is an honour to be invited to someone's wedding. I am also likely to send apologies for the December baby shower, for various reasons, and feel okay about doing that.

The other nice thing about this week?
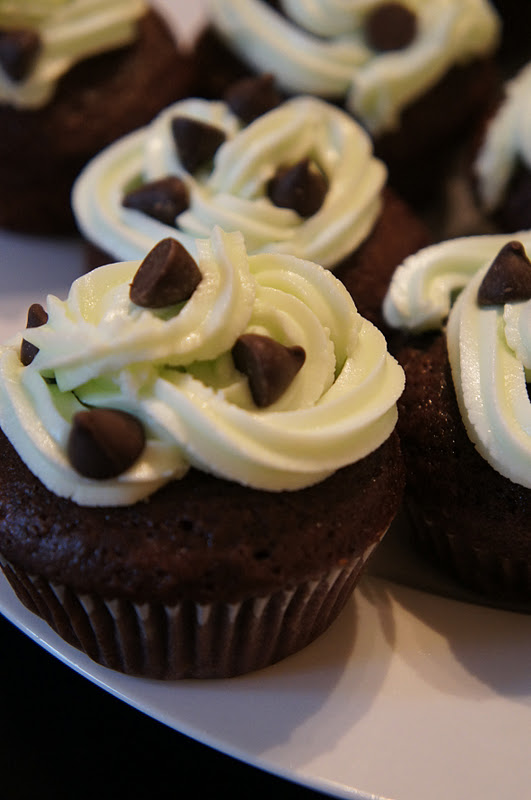

My going-on-maternity-leave friend, who I will christen G. for the purposes of this post, gave me an opportunity for more chocolate mint baking. She has a real affection for chocolate mint, and I was more than happy to cater to this for her farewell morning tea.

What is more, in addition to chocolate mint baking, G. provided me with an opportunity to visit Wagamamas for her farewell lunch. You see, I live quite close to a Wagamamas but have never been, and this was starting to play on my mind.

(In case you were wondering, yes, there was a farewell morning tea and a farewell lunch. One was workplace wide, and one was not. These things can be tricky to fit in!)

I will leave Wagamamas for another day, but am rather excited to share this recipe for chocolate mint cupcakes, which are adapted from these ones at Chocolate Covered Katie. Whilst vegan, I can promise you that no one will know if you don't want them to. I gave them to friends and strangers alike and there were certainly no complaints - and no questions about eggs or milk.

Vegan Chocolate Mint Cupcakes
Makes 12 standard sized cupcakes

Ingredients:
Cupcake ingredients:
  • 1/4 cup good quality cocoa
  • 1 cup plain flour
  • 3/4 tsp baking powder
  • 1/2 tsp baking soda
  • 1/2 tsp salt
  • 3/4 cup sugar
  • 1 1/2 tbsp corn flour
  • 1 1/2 tsp vanilla extract
  • 2 tsp peppermint extract
  • 1/2 cup soy milk
  • 1/2 cup vanilla soy yoghurt
  • 1/3 cup apple sauce
  • 1 tbsp oil


Icing ingredients:
  • 2 cups icing sugar
  • 3 tbsp non-dairy spread (I used Nuttelex), at room temperature
  • 1 tsp soy milk
  • 1 tsp peppermint extract
  • 1 drop (literally, 1!) of green food colouring
  • Non-dairy chocolate chips, extra, for decorating


Instructions:

1. Pre-heat oven to 180'C and prepare a 12 pan muffin tray.

2. Combine cocoa, flour, baking powder, baking soda, salt, sugar, and corn flour in a large bowl.

3. In a separate bowl, combine the vanilla and peppermint extracts, soy milk, soy yoghurt, apple sauce and oil and whisk to combine.

4. Add the wet ingredients to the dry, and mix through.

5. Divide the mixture between the 12 muffin pans. Bake for 15 - 20 minutes, until the tops spring back when touched.

6. To make the icing, combine all ingredients in a large bowl and beat with an electric beater until well-combined and fluffy. Allow to cool completely before icing.


The cupcakes themselves were good.


But the cupcakes with icing were even better.


Mr Bite liked them.

G. liked them.

The rest of the workplace liked them.

If you like mint and chocolate, I think you will too.

What has your week featured?

Tuesday, November 8, 2011

Bookmarked recipes I've made - Part 1

20 comments
I have so many bookmarked recipes, and bookmark new ones on such a regular basis, that I am starting to realise I will never get through them all. It's just not possible.

Every now and then I force myself to do a clear out, deleting recipes I've managed to make (this part is easy) and some of those that I realise, on reflection, I probably won't make (this part is harder). Fancy, fiddly, many step recipes often end of going in the latter category.

Even with this bookmark culling, things are still a little out of hand.

Today, though, my exploding Recipes folder is actually not our focus. I am happy to bring you five recipes that I bookmarked and actually have made.

I made these almost exactly as per the original recipes (I've indicated any changes I did make), and they were all so good that I think you should bookmark them too.

I take no responsibility for any exploding bookmark folders that may result.


I made these with that very exciting tin of canned pumpkin. I think the pumpkin went to a noble cause.


I used white pastry flour in the crust (instead of spelt) and in the filling (instead of wholemeal pastry flour), because I didn't have the listed flours to hand. I also didn't add the optional chocolate chips - but these were good enough without chocolate.


I made these when we had my parents and brother over for dinner, after my parents got back from their overseas trip.

Brownie base pre-icing

Brownies with icing

I followed the recipe exactly and am so very glad I did. These really are Pure Amazingness in raw brownie form.

I actually liked these best a day after making them, and when they were only a few minutes out of the freezer. If I'm honest, though, I would probably have eaten them completely frozen or at room temperature. I am now searching for the right opportunity to make Hannah's follow-up Raw Vegan Carob Maple Brownies to Make You Swoon, which is still in my bookmarks list.


I threw the tempeh and sauce / glaze into a vegetable stir fry, with great success:


The flavour combinations worked wonderfully, with the orange tones providing a nice contrast to the usual stir fry ingredient mix. This was actually the first time I'd tried tempeh, and it was a good introduction.


Tofu Nuggets from Peas and Thank You (the book)

This one was bookmarked in real life (book form) rather than on my computer, but I thought I'd throw it in here anyway. My nuggets were a lot messier than the ones in the book...


...but they still tasted pretty brilliant. The combination of hummus, nutritional yeast and breadcrumbs, amongst other things, works extremely well in providing the nugget coating.


I made these in part for a work morning tea, and in part just because.


They went down a treat with Mr Bite and are also incredibly easy to make, thus getting me over my misconceptions around rolled and cut-out biscuits being fiddly. I can see these becoming a regular in my baking rotation.


How is your bookmarks folder going? Have you tried any of the above?

Sunday, November 6, 2011

Vegemite, Marmite, and Promite

35 comments
If you're Australian, you may feel loyalty to Vegemite over all other yeast spreads (even though it's owned by Kraft, an American company).

If you're not Australian, it may be a complete mystery to you.

I find both of these statements completely understandable.

I like Vegemite (very much) but it is an odd looking substance. I do also wonder how the idea of creating a 'concentrated yeast extract' first came about. As we saw in this post, Vegemite was first created in Australia in 1922. The English Marmite has been around since 1902 and Cenovis, a Swiss version, since 1933. That's quite a long history for a collection of vegetable spreads that, generally speaking, one either loves or hates.

I grew up with Vegemite and Promite, the latter being a somewhat milder version of Vegemite that is also Australian (but owned by Mars...). In my I-only-want-this-on-my-sandwich-every-day-for-3-months primary school days, Vegemite was a frequent favourite. I liked Promite for variety though, and also enjoyed English Marmite on our English holidays.

A month or so ago, I realised that I couldn't fully recall the flavours of Promite or Marmite. As I don't eat a lot of plain bread / toast / plain crackers, so well suited to being spread with spreads, I tend to have Vegemite only a few times a month. This means that there's not a lot of room for routinely rotating through alternatives, and it's been years since I tried the other options.

I thus decided to do a taste test. First, though, I had to work through the confusing differences between English and Australian Marmite.

I wanted the English Marmite, obviously, in order to bring back my faded English memories. The only problem is that in Australia, English Marmite is called Our Mate.


This is because Sanitarium bought the rights to the Australian and New Zealand distribution of Marmite in 1908, and they have modified the product somewhat over time. The original (English) Marmite now differs to the Sanitarium Marmite, but the original version can't be called Marmite in Australia because the Sanitarium product holds the name.

I know. It's all very confusing.

After we tracked down the English Marmite in the foreign food section of Coles, I roped Mr Bite into being my blind taste tester and we journeyed into the land of black salty spreads.


He did his taste testing off crackers, whereas I used a spoon. Frankly, I wouldn't really recommend the spoon approach, but I did at least get an untainted taste experience. 

I also drank a lot of water between tastes.

Promite


Promite has a considerably longer ingredient list than Vegemite, as well as more sugar (18.5 g / 100 g vs. 2.2 g / 100 g), and this is evident in both the taste and the smell. It's sweeter and mellower - like a mild version of Vegemite.

Mr Bite hadn't tasted Promite before, but as he'd had both Vegemite and (English) Marmite he was able to accurately identify it. His description was "fruity, with more flavours than Vegemite". He didn't exactly dislike it, but he did indicate he would be unlikely to have it again.

I agreed with his description - there is definitely a depth of flavour that the other spreads don't have - and found it considerably less intense than either Vegemite or (English) Marmite. I imagine it would be a good starter for people who haven't tried yeast spreads.


(English) Marmite


You'll notice that I am persisting in calling this Marmite, even if the jar says something else. Our Mate just makes me giggle.

The ingredient lists starts off looking like Vegemite, but after the initial yeast extract and salt, it branches out to list 'vegetable extract' and 'spice extract', in contrast to Vegemite's 'malt extract' and 'flavours'. 


In truth, they are quite similar. Mr Bite described Marmite as stronger, and I would fully agree - but that's the only real difference either of us could put into words. The flavours also vary slightly, but the main contrast is intensity. 

Oddly, despite the stronger flavour, the appearance of this is almost runny. It isn't (the spread below is actually quite thick) but it certainly has a lighter look to it.


Marmite is probably not for the faint hearted. It's also most definitely better off a cracker than off a spoon.


Vegemite


Vegemite. Breakfast of champions, source of Vitamin B, and linked in my mind with old-fashioned children with rosy cheeks singing in ads.

When trying to describe the flavour of Vegemite, though, I realised that I actually can't. It's easy to compare it to other things (stronger than Promite, less intense than Marmite) but not to put its taste into words.


Salty, strong, intense, yeasty...the combination of those things is unimaginable until you take a bite. I could compare it to nutritional yeast, for someone who has tried that and not Vegemite, but Vegemite has a certain something that makes it stand out.


Mr Bite and I concurred that it was similar to Marmite, but better, and that Promite is in a different category altogether. Not a bad category, just a different one.

Mr Bite concluded his testing by announcing that he will be sticking with Vegemite, thus leaving me with two jars of yeast spread to slowly work my way through. Just not with a spoon.

Do you like Vegemite? Any favourite uses? How about other yeast extract spreads?

Friday, November 4, 2011

Raw homemade coconut chocolate butter with chilli and goji berry

13 comments
Remember this post about the forgotten delights and raw food products of Fremantle?

In particular this raw coconut chocolate butter with chilli?


Since trying this amazing but rather expensive spread, I have wanted to try making it at home.

This week was it.

Only five ingredients are required (six if you count water) and the process takes about 30 minutes, most of which is the food processor working whilst you do something else. Or while you watch impatiently, whichever appeals to you more.

My version had a certain rustic appearance that wasn't quite the same as the picture-perfect smoothness of the original Cocopure product. However, I can say with some confidence that it was just as enjoyable to eat.


Don't take my word for it though. Try it, and then let me know!


Raw homemade coconut chocolate butter with chilli and goji berries

Adapted from the Cocopure ingredients list
Makes about a cup (approximately, I didn't actually measure)

Ingredients:
  • 70g (1 cup) moist coconut flakes
  • 20g (1/4 cup) goji berries
  • 35g (1/2 cup) good quality raw cocoa (or regular cocoa if you don't care about the raw aspect)
  • 1/4 tsp chilli flakes, or chopped dried red chilli - more if you want it to be very spicy
  • 1 tsp vanilla
  • About 2 tbsp water, or as needed to smooth things out


Instructions:

1. Process the coconut in a food processor until it starts to liquefy - about 10 minutes. This would take longer if your coconut wasn't the moist variety, but you could also add a dash of coconut oil to help things along.


2. Add the goji berries and process for another 5 minutes or so, until they are well processed and the mixture turns orangey.


3. Add the cocoa, chilli flakes and vanilla and continue processing, adding the 2 tbsp water in small amounts. I did 10 minutes of processing and then let the food processor have a break for 20 minutes or so (I was worried it would over-heat), before doing another 5 - 10 minutes.

I could probably have continued processing for a bit longer and got a smoother finish, but I didn't feel the need (and didn't have the patience...). You could though, if smoothness is your thing.


4. Store in an air-tight container or jar at room temperature.


This tasted incredibly close to the original. As noted, it wasn't as smooth, and I think it was a little more chocolatey and a little less chilli-y. The goji berries aren't really detectable in the Cocopure version or in this one, although I suspect I'd notice if they were taken out. The coconut is definitely present, but it isn't strong.

There were also two ingredients in the Cocopure ingredient list that I didn't end up including - because I completely forgot! They were salt and agave syrup, and whilst I can honestly say I didn't miss them, I will probably try including them next time for comparison purposes. I don't think I'd want more than a teaspoon of agave, though, as I didn't think this needed sweetening.


All in all, I was very happy with how this turned out. The smell and taste are incredible, the ingredient list is short, and the process is easy - and certainly cheaper than store-bought.

Plus, this way, you get to lick the bowl.

Wednesday, November 2, 2011

One way of choosing a camera

13 comments
As I recently mentioned excitedly proclaimed to just about everyone I know, I am the new owner of a Sony Nex C-3 camera.

When I mentioned that I was looking to make a new camera purchase, in this blog post a few weeks ago, I was surprised at how many people reported putting off big technology-related purchases, or just being unsure of how to make them.

But then I realised that I had been pondering a camera purchase since June, and that my camera advise-seeking from the blogging world (along with friends, family, work colleagues, vague acquaintances, near strangers...) was proof that I experience exactly the same thing.

After all, parting with large sums of money for something that may break, be superseded, or otherwise provide a source of regret is always going to be challenging.

Given all of the above, I thought I would share how I went about this particular purchase. My process will never be quite the same as yours, and even if you went through the same steps as me you would very likely reach a different conclusion (unless you have exactly the same camera preferences and requirements as I do). However, given the number of hours I spent thinking about cameras, I thought I may as well document some of what I learnt.

It's quite long, and a little technical at times, but if you want to come for the ride I hope it may be of use.

Step 1: Start broad


I read a few camera buying guides that suggested starting by deciding what you want, in terms of the sorts of photographs you take and the sorts of camera features you require.

I didn't have a clue. Food photos? In mixed lighting, sometimes up close, sometimes not? But also sometimes landscape photos, or photos of people? I didn't think that vague list of requirements would get me very far.

Before I started searching, I didn't even know of the existence of the camera category I ended up picking. Starting broad was my only option. In effect, I just googled things like "best digital cameras", "how to choose a camera" and "camera rankings".

In my case, this turned up the following:
  • An explanation of the three main categories of camera:
    • Digital point and shoot, your typical digital camera
    • Digital single lens reflex (DSLR), with interchangeable lenses and optical viewfinders, renowned for good photo quality and bulkier camera bodies
    • The intermediate, hitherto unknown to me, compact interchangeable lenses (also known as micro four thirds system cameras), which feature changeable lenses like the DSLR systems, and have similar image quality in many instances, but are smaller, don't (usually) have an optical viewfinder, and have fewer manual and lens options.
  • Explanations of the importance of sensor size, not just megapixels, when judging the likely image quality of a camera (the larger the sensor, the more light captured by the camera and used for your photo - it is large sensors that largely account for the superior results of DSLR cameras).

Step 2: Narrow your focus


After my googling and reading, I started to develop a preference for compact interchangeable lens models. I also confirmed in my own mind that DSLR models were likely to be out of my price range, and that I probably wouldn't carry one around with me on holiday (many people do, so you might be completely different).

I then focused in on reviews of interchangeable lens models, as well as some of the newer point-and-shoot options, and used ranking lists, reviews and ratings to identify those that seemed to perform well.

Step 3: Do a detailed comparison

This is where I inevitably use a spreadsheet. These days I usually do so in Google Docs, but Excel would work just fine too (or even a table in Word, or on a piece of paper, if that's your inclination). I honestly can't imagine doing comparisons without one, but I am conscious that I may be more obsessive with details and tables than most people!

My comparisons went into a table like this...


You can see the full spreadsheet here , which lists 11 cameras in total. The greyed out columns were ones I discounted, the first two bolded columns were my final short list, and the highlighted Sony column is the one I bought.

Step 4: Shop, price check, and talk


Go (window) shopping. Up until this stage, I hadn't gone to look at the models I was considering. I didn't decide on my final two short listed options until after doing this, and had actually thought seriously about the Olympus Mini before doing so (I ended up not liking it so much in person). This allows for price comparisons across shops too.

As a side note, many cameras can be bought more cheaply online from places like the US than from Australia. I decided against doing this because (i) of the GST and customs implications for purchases over $500, (ii) the possibility of warranty / repair issues on an overseas bought product, (iii) a slight sense of loyalty to Australia, and (iv) a desire to get the camera on the day I paid for it.

Whilst shopping, I also talked to store assistants and subsequently asked opinions and advice from family and friends - and you!

Step 5: Think about it

By the time I got to this stage I had, obviously, already given things quite a lot of thought already. However, I still like to think and wait just a little bit longer. In my case I waited about 2 weeks after deciding on the Sony, and found that the fortnight convinced me I really did want it.

Step 6: Shop for real!

Go armed with confidence, a credit card, and hope that your camera will be in stock.

Go home with excitement, a depleted bank balance, and the happy anticipation of hours of fun ahead.


Tuesday, November 1, 2011

Gardening and kitchen-ing

14 comments
I know it's Tuesday.

And I've already done 3 posts relating to last weekend.

However, we managed to squeeze so much into last Friday through Sunday that I'm hoping you'll forgive me for staying with those days for just one more post.

You see, in addition to new camera purchasing (and playing), a long (and free) train trip, and vegan chocolate biscuit construction, there was some gardening and kitchen reorganizing.

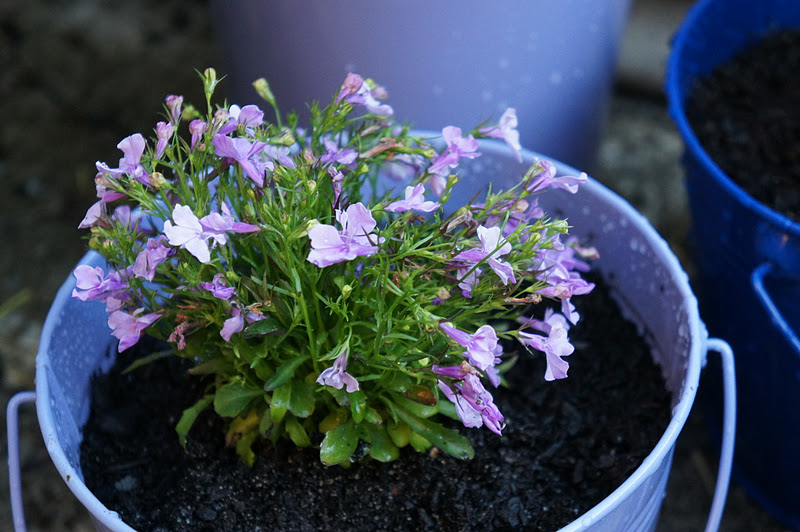
The gardening was to add flowers and colour to what is mostly vegetables / herbs and greenery:


The total cost of this, for the pots and the flowers, was under $40. I think I have over $40 worth of pleasure from the resulting scene, so I'm quite happy. Now I just have to make sure I don't kill them (I have very little flower experience!)

The kitchen reorganizing was the latest in my ongoing attempt to streamline our pantry. For someone who likes things to be organised, the state of my baking shelf (the lowest shelf in the pantry, perfect for stacking up and over-crowding) is somewhat embarrassing. In truth, it is constantly on the verge of exploding.

This is a relatively good day...

The rest of the pantry is fairly well organised on shelf-stackers and similar organising systems, but they don't seem up to the task when it comes to this shelf.

As I first mentioned here, I wanted to utilise Ikea to come up with a solution. The end of our U-shaped kitchen had a completely empty wall just perfect for shelves or racks, and I ended up deciding on an 80cm Grundtal rail with hanging shelf and spice rack.

Before:

And after:


I am very, very, very happy with this new arrangement. My baking shelf is still quite chaotic, but I keep catching sight of the new shelves and jars and smiling to myself - and there are definitely fewer bags of dried fruit and nuts (etc) thrown at the back of the pantry. I am extremely grateful to Mr Bite for his drilling efforts in getting the rail in, especially as he hit brick about 1cm into the wall. Apparently drills don't just cut through all surfaces with ease. Who knew?

The small jars contain crushed peanuts, pine nuts, chia seeds, flaxseeds, carob powder, currants and raisins, with the empty one being reserved for goji berries. They're things I either use infrequently or in small doses, making the small jars a good match. The two large jars have dates and raw almonds, which I use more often. 

I can also fit an additional 4 small jars into the 3-level rack if I want to, as the little jars can fit on the shelves sideways.

The cost for this task? About $80 for the full set of Ikea components, jars included. Not a trivial sum, but one that again seems worthwhile for the benefits in organisation and in enjoyment.

Now I just need to make sure I don't re-fill my new pantry space with yet more baking paraphernalia.

Have you had any recent house or garden entertainment? Or do you have any solutions for my exploding pantry?